Staying organizedon the trail isn’t just about convenience—it’s about safety, efficiency, and preserving the joy of the hike. Nothing derails a perfect day on the trail faster than a tangled hydration hose buried beneath a chaotic jumble of gear, or realizing your snacks are soaked because your bladder leaked onto everything else. For hikers who’ve embraced the hands-free hydration revolution, a standard backpack organizer simply won’t cut it. You need a system specifically engineered to harmonize with your hydration bladder, not fight against it.
The right hydration-bladder compatible backpack organizer transforms your pack from a black hole of frustration into a streamlined command center where every piece of gear has its place, your water flows freely, and you can access essentials without breaking stride. But with countless variations in design, materials, and compatibility features, selecting the perfect organizer requires more than a casual glance at product photos. This comprehensive guide breaks down everything you need to know to make an informed decision that matches your hiking style, pack configuration, and on-trail needs.
Top 10 Hydration-Bladder Compatible Backpack Organizers for Hikers
Detailed Product Reviews
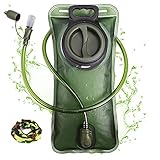
1. Hydration Bladder, 2L Water Bladder for Hiking Backpack, BPA-Free Leak Proof Water Reservoir Storage Bag, Hydration Pack Replacement for Camping Cycling Running, Military Green
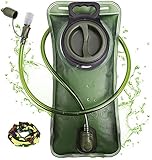
Overview: The CHERAINTI 2L Hydration Bladder delivers essential hydration capabilities for outdoor enthusiasts in a military-green package. Designed as a universal replacement for hiking backpacks, this BPA-free reservoir balances capacity and portability for day hikes, cycling, and camping adventures.
What Makes It Stand Out: Its oversized opening sets this bladder apart, allowing direct hand access and easy ice cube insertion from refrigerator dispensers. The quick-release tube system features an intelligent auto-shutoff mechanism that prevents leaks when detached, letting you store the full bladder in a fridge without messy hoses. The high-flow bite valve with protective cover ensures clean, convenient drinking on the move.
Value for Money: At $9.99, this bladder sits in the budget-friendly sweet spot. It undercuts premium brands significantly while delivering comparable core features like pressure tolerance and temperature resistance (20-50°C). The double-sealed edges enhance durability, offering long-term value that exceeds its modest price point against alternatives costing twice as much.
Strengths and Weaknesses: Strengths include the exceptionally wide opening for cleaning, reliable leak-proof construction, and lightweight design that doesn’t add bulk. The auto-shutoff connector is genuinely useful for storage. Weaknesses include a narrower temperature range than some competitors (-20°C start would be better for winter sports), and the basic bite valve may not match the flow rate of premium options.
Bottom Line: An excellent entry-level hydration bladder that prioritizes practicality and affordability. Ideal for casual hikers and cyclists who want reliable performance without premium costs. The cleaning convenience alone makes it worth considering over similarly priced alternatives.
2. Replacement Hydration Bladder Compatible with Camelbak Backpack, 2L Water Bladder for Hiking Backpack, No Leakage Water Reservoir Storage Bag, with Large Opening, for Camping, Cycling and Running

Overview: This purpose-built replacement bladder targets Camelbak users seeking a direct compatibility match. The 2L reservoir serves as a cost-effective alternative to OEM replacements, maintaining the same form factor while promising enhanced flow rates and leak-proof performance for serious outdoor athletes.
What Makes It Stand Out: Explicit Camelbak compatibility eliminates guesswork for existing backpack owners. The manufacturer claims 20% more water per sip compared to standard bladders—a significant advantage during intense activities. The upgraded twist-cap design and integrated dust cover demonstrate attention to detail that prevents common failure points found in generic alternatives.
Value for Money: At $19.99, this sits at the mid-range price point—roughly $10 more than budget options but potentially half the cost of official Camelbak reservoirs. The ergonomic shaping and enhanced flow rate justify the premium over basic models, particularly for users who already own compatible packs and want performance without paying brand-name prices.
Strengths and Weaknesses: Strengths include guaranteed Camelbak fit, superior flow rate claims, and a silky interior that dries quickly to prevent mold. The comprehensive leak-proof system covers cap, valve, and tube connections. Weaknesses include the higher price point for budget-conscious buyers, and the 20% flow increase claim lacks independent verification. Non-Camelbak users may find better value elsewhere.
Bottom Line: A smart upgrade for Camelbak owners needing replacement bladders. The compatibility assurance and performance claims make it worth the modest premium over generic options. Verify your pack model first, but this delivers OEM-like quality without OEM pricing.
3. Hydration Bladder, 1.5L Water Bladder for Hiking Backpack, BPA-Free Leak Proof Water Reservoir Storage Bag, Water Pouch Hydration Pack Replacement for Camping Cycling Running, Military Green
Overview: The CHERAINTI 1.5L Hydration Bladder scales down capacity for lightweight pursuits where every ounce matters. This compact reservoir maintains the same military-green aesthetic and core features as its larger siblings, targeting runners, short-distance cyclists, and minimalists who prioritize mobility over maximum water storage.
What Makes It Stand Out: Its impressive -20 to 50°C temperature tolerance exceeds many competitors, making it suitable for winter sports and summer heat alike. The identical feature set to larger models—including the wide-mouth opening and auto-shutoff connector—means you don’t sacrifice functionality for size. At 1.5L, it fits smaller hydration sleeves that might swallow a 2L bladder.
Value for Money: At $8.99, this is the most affordable option in the CHERAINTI lineup, offering the same premium materials and construction as larger versions. For activities under two hours, 1.5L is often sufficient, making this a smarter purchase than carrying unnecessary capacity. The price-to-feature ratio is exceptional for budget-minded adventurers.
Strengths and Weaknesses: Strengths include the superior temperature range, lightweight profile, and full-sized features in a compact package. The 4-inch cap opening remains class-leading for cleaning. Weaknesses include limited capacity for long, hot excursions where 2-3L is preferable. The smaller size may shift around in packs designed for larger bladders.
Bottom Line: Perfect for high-intensity activities where weight savings trump capacity. Trail runners and mountain bikers will appreciate the reduced bulk without compromising on quality. If your adventures typically run under two hours, this offers the best value in the CHERAINTI range.
4. HEIKLN Hydration Bladder 2 Liter,Water Bladder for Hiking Backpack,Leak Proof Water Bladder Bag, BPA Free Military Water Storage Bladder, Hydration Pack for Bicycling Hiking Camping Hunting Running

Overview: HEIKLN positions its 2L hydration bladder as a rugged, certified-safe option for demanding outdoor use. With SGS certification and food-grade materials, this transparent-tubed reservoir targets safety-conscious adventurers who want visual confirmation of cleanliness and water levels during hunting, hiking, and multi-sport activities.
What Makes It Stand Out: SGS certification and 100KG pressure tolerance claims set a high durability standard. The transparent tube design allows users to spot mold or debris that opaque tubes hide—a critical hygiene advantage. The included carabiner clips add immediate utility, while the -20 to 50°C temperature range covers extreme environments from ski trails to desert treks.
Value for Money: At $8.99, this matches the lowest-priced 2L options while offering premium certifications and accessories. The pressure tolerance and edge-sealing technology suggest longer lifespan than typical budget bladders. Free carabiners and a satisfaction guarantee sweeten an already competitive package, undercutting mid-tier brands by 50% or more.
Strengths and Weaknesses: Strengths include verifiable safety certifications, exceptional pressure rating, transparent tubes for hygiene monitoring, and useful accessories. The wide temperature range suits all-season use. Weaknesses include a slightly smaller cap opening (3.5") than CHERAINTI models, and the brand lacks the established reputation of Camelbak or Osprey, making long-term durability an unknown.
Bottom Line: An outstanding value proposition for safety-focused buyers. The certifications and transparent design address key concerns about water quality. If you want premium specs at budget pricing and don’t mind a lesser-known brand, this is a top contender. The included accessories make it an even smarter buy.
5. Hydration Bladder, 3L Water Bladder for Hiking Backpack, BPA-Free Leak Proof Water Reservoir Storage Bag, Water Pouch Hydration Pack Replacement for Camping Cycling Running, Military Green
Overview: The CHERAINTI 3L Hydration Bladder extends the product line for long-haul adventurers needing maximum water capacity. This military-green reservoir scales up the proven 2L design, offering extended range for ultralight backpackers, desert hikers, and cyclists tackling all-day routes where refilling opportunities are scarce.
What Makes It Stand Out: The 3L capacity hits the sweet spot for multi-hour excursions without the bulk of larger systems. It retains the user-friendly wide opening and auto-shutoff connector that define the CHERAINTI range, ensuring cleaning and storage convenience scales with capacity. The 16.9" length fits most full-sized hydration packs while maximizing volume efficiency.
Value for Money: At $15.29, this represents a modest $5 premium over the 2L version for 50% more capacity—an excellent scaling value. Compared to premium 3L bladders costing $30+, it delivers essential features at half the price. For serious hikers who need the extra water, the price increase is negligible relative to the capacity gain and safety margin it provides.
Strengths and Weaknesses: Strengths include best-in-class opening size for easy filling and ice addition, proven leak-proof construction, and smart quick-release system. The price-to-capacity ratio is compelling. Weaknesses include the same limited temperature range (20-50°C) as the 2L model, excluding winter sports enthusiasts. The larger filled weight may challenge minimalist ultralight purists.
Bottom Line: The ideal choice for distance hikers and hot-climate adventurers who prioritize water security. The thoughtful design scales well to 3L, and the minimal price premium over smaller versions makes capacity upgrades a no-brainer. If you regularly run dry on 2L bladders, this is your solution.
6. N NEVO RHINO Hydration Bladder 2L,Water Reservoir for Hiking Backpack Leak Proof Water Storage Bladder,BPA-Free Water Pouch Hydration Pack for Camping Cycling Running

Overview: The N NEVO RHINO 2L Hydration Bladder delivers a comprehensive hydration solution for outdoor enthusiasts. This thoughtfully designed package includes the reservoir, cleaning kit, tube clips, and hanging hardware—everything needed for hiking, cycling, or camping adventures straight out of the box.
What Makes It Stand Out: The complete accessory bundle sets it apart from bare-bones competitors. The Slide-Seal opening combines leak-proof security with wide-mouth convenience for filling and cleaning, while the high-flow bite valve ensures effortless hydration during intense activity. A protective dust cover keeps the drinking spout clean on dusty trails.
Value for Money: At $14.99, this bladder occupies the mid-range sweet spot. The included cleaning supplies and mounting hardware, typically costing $10-15 separately, make this a genuine value proposition. You’re essentially getting a ready-to-use system without premium-brand markup.
Strengths and Weaknesses: Strengths include the complete accessory package, reliable leak-proof construction, food-grade BPA-free materials, and universal pack compatibility. The pressure-tested design inspires confidence. Weaknesses include lesser brand recognition compared to Osprey or CamelBak, and the tube lacks insulation for extreme temperature performance. Long-term durability remains unproven versus premium options.
Bottom Line: Perfect for casual to intermediate adventurers seeking a feature-rich, reliable hydration system without breaking the bank. The included accessories and solid construction make it a practical, cost-effective choice for most outdoor pursuits.
7. Osprey Hydraulics 2L Backpack Water Reservoir with Bite Valve - BPA-Free, Leakproof Hydration Bladder with QuickConnect and Slide-Seal - Compatible with Most Hiking and Biking Packs

Overview: The Osprey Hydraulics 2L represents the gold standard in premium hydration reservoirs, engineered for serious outdoor enthusiasts who demand uncompromising performance. This reservoir leverages Osprey’s decades of pack-design expertise into a sophisticated water delivery system.
What Makes It Stand Out: The thumb-operated on/off lever enables true one-handed operation—a game-changer on technical terrain. The innovative HydraClip integration and magnetic hose retention system demonstrate thoughtful engineering, while the center baffle design maintains a flat profile that prevents sloshing and buckling during loading. The compact Slide-Seal opening reduces bulk without sacrificing security.
Value for Money: At $50, this is a significant investment. However, the exceptional build quality, proprietary features, and Osprey’s legendary durability justify the premium for frequent adventurers. Cheaper bladders may fail mid-expedition; this won’t. For occasional users, the price is harder to justify.
Strengths and Weaknesses: Strengths include superior construction quality, innovative one-handed operation, stable baffle design, reliable leak-proof performance, and seamless integration with Osprey packs. The magnetic hose system is exceptionally convenient. Weaknesses include the steep price point and limited value for casual users. The premium features may be overkill for simple day hikes.
Bottom Line: For dedicated hikers, mountain bikers, and backpackers who prioritize reliability and refined functionality, this is worth every penny. Casual users should consider more economical options. This is professional-grade gear for serious adventures.
8. Mdvora 1.5L/2L/2.5L/3L Hydration Bladder, Large Opening Water Storage Bladder Bag, for Cycling Hiking Camping(2L,1 Pack)

Overview: The Mdvora Hydration Bladder offers bare-bones functionality at an unbeatable price point. Available in multiple capacities (1.5L, 2L, 2.5L, 3L), this no-frills reservoir focuses on essential performance for budget-conscious outdoor enthusiasts.
What Makes It Stand Out: The sub-$8 price for a 2L bladder is remarkable. Multiple size options allow precise capacity matching for different activities, from short runs to all-day hikes. The self-locking joints and pressure-tested construction provide basic leak-proof confidence without premium cost.
Value for Money: At $7.79, this represents exceptional value—roughly one-sixth the cost of premium alternatives. While lacking accessories and advanced features, it delivers fundamental hydration functionality at a price point where replacement is cheaper than repair. Perfect for beginners testing hydration systems or as a backup.
Strengths and Weaknesses: Strengths include the incredibly low price, multiple size options, large opening for cleaning, and basic leak-proof reliability. It’s lightweight and compatible with most packs. Weaknesses include thinner materials that may compromise long-term durability, absence of included cleaning kit or tube clips, and a basic bite valve that lacks high-flow performance. Brand recognition and warranty support are minimal.
Bottom Line: An ideal entry-level option for casual hikers, festival-goers, or as a spare bladder. Don’t expect premium features or decade-long durability, but for basic hydration needs on a shoestring budget, it’s surprisingly capable. Serious adventurers should invest more.
9. NOOLA Hydration Backpack with 3L TPU Water Bladder, Tactical Molle Water Backpack for Men Women, Hydration Pack for Hiking, Biking, Running and Climbing, Black

Overview: The NOOLA Hydration Backpack is a complete tactical hydration system combining a 3L TPU bladder with a feature-rich 900D nylon pack. This integrated solution targets outdoor enthusiasts seeking both water storage and gear organization in one package.
What Makes It Stand Out: This isn’t just a bladder—it’s a full tactical pack with MOLLE compatibility, nine organized pockets, and abrasion-resistant construction. The BPA-free TPU bladder offers superior taste neutrality compared to standard TPU, while the breathable back panel and padded straps enhance carrying comfort. The 3L capacity supports extended adventures without refilling.
Value for Money: At $35.99 for a complete pack-and-bladder system, this undercuts buying components separately. Comparable tactical hydration packs cost $60-80. The value proposition strengthens when considering the durable 900D nylon and organizational features that eliminate need for additional bags.
Strengths and Weaknesses: Strengths include the integrated design, robust 900D construction, excellent organization with nine pockets, MOLLE expandability, and large 3L capacity. The breathable system enhances comfort. Weaknesses include added weight versus bladder-only options and potential overkill for users who already own compatible packs. The bladder’s long-term durability is unproven compared to standalone premium reservoirs.
Bottom Line: Outstanding value for those needing both pack and bladder. Perfect for hikers, bikers, and tactical users wanting an all-in-one solution. If you already own a quality pack, consider a standalone bladder instead. This excels as a complete system.
10. N NEVO RHINO Water Bladder 1.5-Liter, Leak Proof Water Reservoir BPA-Free, Wide Opening Hydration Bladder for Running Vest Hydration Backpack Replacement for Hiking Cycling

Overview: The N NEVO RHINO 1.5L Water Bladder specifically targets runners with design features that minimize water movement and enhance stability. This specialized reservoir prioritizes a bounce-free experience during high-impact activities.
What Makes It Stand Out: The double-baffle technology is the star feature, significantly reducing water sloshing compared to standard bladders. This running-specific engineering, combined with a high-flow locking valve and quick-release tube, demonstrates purposeful design for athletes. The included neck gaiter adds unexpected value.
Value for Money: At $16.99 for 1.5L, it’s pricier per-liter than its 2L sibling, but the specialized baffle system justifies the premium for runners. Comparable running-specific bladders cost $25-35. The included clips and gaiter enhance overall value for the target demographic.
Strengths and Weaknesses: Strengths include the stabilizing double-baffle design, runner-focused features, high-flow valve with dust cover, large opening for ice and cleaning, and included accessories. The food-grade construction ensures taste-free hydration. Weaknesses include the smaller 1.5L capacity, which may insufficient for longer efforts, and higher cost-per-liter versus general-purpose bladders. The running-specific features offer little benefit for casual hiking.
Bottom Line: An excellent choice for dedicated runners, trail runners, and cyclists prioritizing stability over capacity. The anti-slosh technology genuinely improves the experience. For general hiking or longer adventures where capacity matters, opt for the 2L version instead.
Understanding Hydration-Bladder Compatible Backpack Organizers
What Makes a Backpack Organizer “Hydration-Bladder Compatible”?
True compatibility goes far beyond simply having space for a water reservoir. A genuinely hydration-bladder compatible organizer features a dedicated sleeve or compartment with specific design elements that protect both the bladder and your gear. This includes a hanging loop or hook system to support the bladder’s weight (preventing pressure on the hose connection), a central or side-aligned position that maintains your pack’s balance, and pass-through ports for the drinking tube that don’t require awkward routing or create pinch points. The organizer must also accommodate the unique shape of a filled reservoir—typically tall and relatively flat—without distorting the overall structure of your pack or compressing the bladder to restrict water flow.
The Evolution of Hiking Organization Systems
Traditional backpack organizers were essentially stuff sacks with dividers, designed for static loads like books or laptops. As hydration bladders became standard hiking equipment in the early 2000s, the design paradigm shifted dramatically. Modern organizers now integrate dynamic load management, recognizing that a 3-liter bladder transitions from flat and light to bulky and heavy as you drink through your supply. Today’s best systems employ progressive compression strategies and flexible partitioning that adapt to this changing volume while keeping your other gear stable and accessible. This evolution reflects a deeper understanding of how hikers actually move, stop, and interact with their equipment throughout a day’s journey.
Key Features to Look For
Dedicated Hydration Sleeve Design
The hydration sleeve serves as the cornerstone of compatibility. Look for sleeves constructed from smooth, non-abrasive materials that won’t wear down your bladder’s protective coating over time. The sleeve should be positioned against the pack’s back panel to utilize the frame structure for support and to keep the weight close to your center of gravity. Critical details include a reinforced hanging point rated for at least 10 pounds of static weight—enough to support a full 3-liter bladder plus backup water bottles—and a width that accommodates various bladder brands without excessive compression. The sleeve opening should feature a wide, reinforced mouth that allows for easy insertion and removal, even when the surrounding compartments are fully loaded.
Hose Management Systems
An often-overlooked feature, proper hose management separates functional organizers from frustrating ones. The best designs incorporate multiple routing options—typically at least two exit points on either side of the pack—to accommodate left and right-handed users. These ports should be reinforced with grommets or binding tape to prevent fraying and positioned to create a gentle curve in the hose, avoiding kinks that restrict flow. Internal hose clips or guide loops keep excess tubing secured within the pack, preventing it from tangling with other gear or creating an annoying sloshing sound as you hike. Some advanced organizers even feature magnetic hose retention systems integrated into the shoulder strap area, though these work best when paired with compatible backpacks.
Material Considerations for Durability
Your organizer will face abrasion from gear, moisture from condensation, and UV exposure when your pack is open. Look for high-denier nylon fabrics—at least 420D for the main body and 210D for interior pockets—with a PU coating for water resistance. The material should balance durability with packability; excessively rigid organizers add unnecessary weight and can make packing awkward. For the hydration sleeve specifically, consider a lighter 70D-100D nylon with a waterproof treatment to minimize weight while protecting against slow leaks. Seam construction matters enormously—flat-felled or double-stitched seams with taped edges prevent fraying and maintain structure under load.
Weight-to-Functionality Ratio
Every ounce matters on the trail, but skimping on features to save weight often creates more problems than it solves. The sweet spot for a day-hike organizer typically falls between 4-8 ounces, while multi-day systems might weigh 10-14 ounces but offer significantly more organizational capacity. Evaluate whether features justify their weight penalty: a dedicated sunglasses pocket with microfiber lining adds an ounce but protects $200 optics. Conversely, redundant pockets or excessive hardware can add weight without real benefit. Consider your base pack weight and hiking philosophy—ultralight hikers might accept a more minimalist organizer and rely on careful packing technique, while comfort-focused hikers prioritize accessibility over a few extra grams.
Accessibility and Quick-Access Pockets
The organization only works if you can reach your gear without unpacking everything. Strategic pocket placement should create a hierarchy of access: items needed while moving (snacks, map, headlamp) go in exterior or upper pockets; occasional needs (rain jacket, first aid) in mid-level compartments; emergency or overnight gear (bivy, fire starter) in deeper sections. Look for pockets with contrasting color interiors or zipper pulls that are visible in low light. Stretch mesh side pockets should accommodate various bottle sizes and have compression straps to secure smaller items. Top lid pockets work best when they open away from your body, preventing gear from spilling onto the ground when accessed.
Sizing and Capacity Considerations
Matching Organizer Size to Your Backpack
A common mistake is purchasing an organizer based on pack liter rating alone. The internal dimensions and shape of your specific pack model matter far more. Measure your pack’s main compartment height, width, and depth with the pack fully loaded and compressed as it would be on the trail. Your organizer should fill 70-85% of this space, leaving room for awkwardly shaped items like trekking poles or a foam pad that might need to slide alongside. Many manufacturers provide pack-specific sizing charts, but these often assume a standard pack shape. For frameless or ultralight packs with tapering designs, consider a modular organizer system with adjustable side compression rather than a rigid rectangular unit.
Volume Options: From Day Hikes to Multi-Day Treks
Day-hike organizers typically range from 5-15 liters of internal capacity, focusing on separating layers, lunch, and small essentials. These often feature a simple two or three-compartment design with a dedicated hydration sleeve. For overnight or multi-day trips, organizers expand to 20-30 liters, incorporating removable dividers, external attachment points for gear loops, and more sophisticated compression systems. Some hybrid designs allow you to add or remove sections based on trip length, though these add minimal weight in connection hardware. Consider how the organizer’s volume affects your pack’s overall capacity—a bulky organizer in a 40L pack leaves little room for food and shelter on a two-night trip.
The Goldilocks Principle: Not Too Big, Not Too Small
An organizer that’s too large creates dead space and encourages overpacking, while one too small leaves gear floating loose in your pack. The ideal size allows you to pack all your categorized items with slight compression remaining in each compartment. When evaluating capacity, load the organizer with your typical gear at home and observe how it fits in your pack. Can you still slide a hydration bladder in easily? Does the organizer’s shape cause bulging that creates pressure points on your back? A properly sized organizer should feel integrated with your pack, not like a separate insert fighting for space.
Organizational Layout Strategies
Compartmentalization Best Practices
Effective compartmentalization follows the principle of “like with like” while considering weight distribution. Place heavier items like cook systems or camera gear close to your back and centered vertically. Create a “gravity zone” in the middle third of the organizer for dense essentials. Lighter, bulky items like insulation layers belong in outer compartments or the top section. The hydration bladder compartment should be isolated from electronics and down insulation—a slow leak shouldn’t ruin your sleeping bag or camera. Consider color-coding or labeling systems for internal pockets; some hikers use colored zipper pulls or small tags to identify contents without opening every compartment.
Vertical vs. Horizontal Organization Systems
Vertical organizers stack items front-to-back, creating a slim profile that works well for technical packs with narrow widths. This design excels at keeping weight close to your back but can make accessing items at the bottom challenging without unpacking everything above. Horizontal systems organize items in side-by-side columns, offering better access to specific gear but potentially creating a wider pack profile that affects balance. Many modern organizers hybridize these approaches, using vertical orientation for the main compartments but incorporating horizontal access panels or side zippers for reaching deeper items. Your choice depends on your packing style and how often you need mid-hike access to buried gear.
Mesh vs. Solid Fabric Dividers
Mesh dividers provide visibility and ventilation, allowing you to see contents and preventing moisture buildup on damp gear. However, they snag easily on sharp objects and offer minimal structure. Solid fabric dividers create more defined spaces and protect delicate items but can hide contents and trap moisture. The best organizers use a strategic mix: mesh for pockets containing wet items or things you need to spot quickly (headlamp, map), solid fabric for structural compartments and protecting sensitive gear. Look for mesh with a tight weave (at least 4-5 strands per centimeter) and reinforced edges to prevent tearing under load.
Compatibility Factors
Universal vs. Brand-Specific Designs
Universal organizers promise compatibility across pack brands but often achieve this through compromises like adjustable straps that add weight or generic sizing that leaves gaps. Brand-specific organizers integrate seamlessly with particular pack models, featuring matching attachment points and optimized dimensions. However, they lock you into that pack ecosystem. A middle-ground option gaining popularity is the “platform-specific” organizer, designed for common pack constructions (like frameless ultralight packs or internal-frame hiking packs) rather than specific models. These offer tailored features without complete brand lock-in. Consider your pack loyalty—if you upgrade packs frequently, a universal design with excellent compression adjustments offers better long-term value.
Bladder Size Accommodation (1L to 3L)
Your organizer must handle your typical bladder size while offering flexibility for different trip demands. A sleeve designed for a 3-liter bladder will swallow a 1-liter unit, but without side compression, the smaller bladder will slump and potentially shift weight unexpectedly. Look for sleeves with adjustable side compression straps or removable spacers that adapt to different bladder volumes. The hose exit ports should position correctly for various bladder heights—some bladders have top-center ports while others exit from the side. If you use insulated bladders for winter hiking, ensure the sleeve width accommodates the additional bulk of insulation without compression.
Integration with Existing Backpack Features
Your organizer shouldn’t negate your pack’s built-in features. If your pack has a separate sleeping bag compartment, the organizer’s bottom should align above this divider. External shovel pockets should remain accessible, and side compression straps must still function with the organizer in place. Check that the organizer’s attachment system doesn’t cover your pack’s ice axe loops or trekking pole carry systems. Some organizers feature cutouts or skip sections in their design to accommodate these external features. For packs with removable top lids, ensure the organizer’s height allows the lid to close properly without creating a gap that lets rain in.
Material and Construction Quality
Weather Resistance and Water Protection
While no organizer is fully waterproof, water resistance is crucial for protecting gear from bladder condensation and external moisture. Look for fabrics with a minimum 1,500mm hydrostatic head rating on the hydration sleeve interior. The main compartment can use a lower rating (800-1,000mm) since it’s protected by your pack’s rain cover. Critical seam areas, especially around the hydration sleeve and bottom panel, should have sealed or taped seams. Consider organizers with a DWR (durable water repellent) coating that can be renewed with aftermarket treatments. Some designs incorporate a waterproof “bathtub” bottom that protects against standing water if you set your pack down in a puddle.
Reinforced Stress Points and Seam Construction
The hanging point for your hydration bladder endures constant dynamic loading as you move. This point should feature bar-tacked stitching (at least 20 stitches per bar) and possibly a reinforced patch of heavier fabric. Corner seams on rectangular organizers experience significant stress when the pack is overfilled; double-stitched flat-felled seams prevent blowouts. Zipper installations need reinforced zipper tape and should be YKK or similar high-quality brands. Inspect how pocket attachment points are handled—pockets sewn only to the interior liner fabric will tear away under load, while those anchored to the main structural panels last for years.
Easy-Clean and Antimicrobial Treatments
Hydration bladders can develop mold and mildew, and these issues can transfer to your organizer. Look for interior fabrics treated with antimicrobial agents, especially in the hydration sleeve. These treatments typically last 20-30 washes before needing reapplication. Light-colored interior fabrics make it easier to spot dirt and mold growth early. Removable, washable inserts for the hydration sleeve offer the best hygiene solution, allowing thorough cleaning without washing the entire organizer. Avoid organizers with complicated seam structures in the hydration area that trap moisture and are difficult to dry completely.
Specialized Features for Different Hiking Styles
Ultralight Backpacking Considerations
Ultralight hikers face a paradox: they need organization to avoid carrying duplicate gear, but every ounce counts. The solution lies in hybrid organizers that double as gear storage off-trail. Look for designs that weigh under 5 ounces but offer removable features—like detachable pockets that become hip belt pouches, or compression straps that convert to gear ties. Dyneema composite fabrics provide exceptional strength-to-weight ratios but at premium prices. Some ultralight organizers eschew zippers entirely, using roll-top closures and hook-and-loop systems that shave weight but require more careful packing. The key is choosing an organizer that eliminates the need for separate stuff sacks, netting a weight savings overall.
Technical Climbing and Scrambling Needs
When your hike involves vertical terrain, gear security becomes paramount. Organizers for technical use should feature locking zipper pulls (or no zippers at all) to prevent accidental opening when brushing against rock. Gear loops on the exterior allow attachment of quickdraws or protection, while internal tie-down points secure heavy items that could shift your balance. The organizer must maintain its shape even when partially empty to prevent gear from settling into awkward positions against your back. Consider models with a semi-rigid back panel that provides structure without adding significant weight. Hose management systems should be completely internal to avoid snagging on rock features.
Family Hiking and Group Organization
Hiking with children or in groups often means carrying shared gear and emergency supplies for multiple people. Organizers with color-coded compartments or removable dividers allow you to separate adult gear from kid essentials. Transparent mesh panels let you verify that first aid kits and emergency items are packed without unpacking everything. Some family-oriented designs incorporate external pockets sized for kid-friendly water bottles and snacks, teaching young hikers to manage their own gear. Consider organizers with expansion capabilities—compression zippers that allow the unit to grow for longer family trips when you’re carrying more supplies.
Winter and Extreme Weather Adaptations
Cold weather hiking introduces unique challenges: hydration tubes freeze, gear gets wet from snow, and you need frequent access to layers. Winter-specific organizers feature insulated hydration sleeves with reflective liners that radiate body heat toward the bladder. Hose ports positioned higher in the pack keep tubes closer to your warm back. Oversized zipper pulls accommodate gloved hands, and pocket layouts prioritize quick access to puffy jackets and traction devices. Some designs incorporate a separate “wet gear” compartment with drainage grommets for storing crampons or snowshoe bindings away from dry insulation. The fabric should remain pliable in sub-zero temperatures—nylon becomes brittle around -20°F, while TPU-coated fabrics maintain flexibility.
Installation and Setup Best Practices
Proper Bladder Insertion Techniques
Installing your hydration bladder correctly prevents leaks and ensures consistent water flow. First, partially fill the bladder (about 1 liter) to give it structure without maximum weight. Insert it into the sleeve with the hose connection point oriented toward the exit port, ensuring the bladder sits flat against the back panel. Secure the hanging loop, then slowly fill the bladder to capacity while supporting its weight—this prevents stress on the attachment point. Before closing your pack, route the hose through the designated port and clip it to the internal guides, leaving enough slack to accommodate pack movement but not so much that it flops around. Finally, purge air from the system by sucking water through the bite valve with the bladder held high, then lock the valve.
Hose Routing for Optimal Flow
Hose routing affects both convenience and flow rate. The ideal path creates a gentle curve from bladder to shoulder strap without sharp bends or elevation changes that require excessive suction. Route the hose over your shoulder rather than under your arm—this keeps it accessible and prevents compression against your body. Use the pack’s external hose clips to secure the tube along the shoulder strap, positioning the bite valve at chest height for easy access without removing the pack. In cold weather, route the hose inside your pack until the last possible exit point to maximize insulation. If your organizer lacks dedicated hose ports, create a protected channel using foam pipe insulation secured with duct tape, though this adds bulk.
Securing Your Organizer Within the Pack
An organizer that shifts during hiking creates discomfort and makes gear unpredictable to locate. Most organizers secure via a combination of methods: a top hook or loop attaching to your pack’s internal hang loop, side compression straps that thread through daisy chains on the organizer, and a bottom stabilizer strap or Velcro panel. Attach the top point first, then load your gear and compress the organizer before securing side straps—this prevents bulging. For frameless packs, consider adding a thin foam pad behind the organizer to protect your back from hard edges and provide structure. Test the setup by shaking your loaded pack vigorously; if you hear gear shifting or feel movement, adjust the compression or add foam spacers to fill gaps.
Maintenance and Care
Cleaning Your Organizer and Hydration System
Separate cleaning of your organizer and bladder prevents cross-contamination. For the organizer, empty all pockets and shake out debris after each hike. Monthly, wash it in warm water with a mild, fragrance-free soap—avoid harsh detergents that degrade water-resistant coatings. Use a soft brush on stubborn dirt, paying special attention to zipper teeth and seam crevices. For the hydration sleeve, consider using a bottle brush to scrub interior surfaces, especially if you’ve noticed any mildew smell. Never machine wash or dry your organizer; the agitation and heat destroy seam tape and fabric treatments. After washing, rinse thoroughly and hang to dry in a well-ventilated area away from direct sunlight.
Drying and Storage Protocols
Proper drying prevents mold and extends fabric life. After washing, prop the organizer open with rolled towels or inflatable drying aids to maintain airflow. Position it in a breezy area with a fan circulating air—drying can take 24-48 hours depending on humidity. Ensure the hydration sleeve is completely dry by stuffing it with newspaper that you replace every few hours; moisture trapped here is the primary cause of organizer degradation. For long-term storage, keep the organizer loosely packed with acid-free tissue paper to maintain shape, and store it unzipped in a breathable cotton bag (not plastic, which traps moisture). Add a silica gel packet to absorb ambient humidity, and check it quarterly for any signs of mildew.
When to Replace Your Organizer
Even quality organizers have a finite lifespan. Replace yours when you notice any of these critical failures: zipper teeth missing or separating under load, seam tape peeling or delaminating, fabric abrasion that reveals the weave structure, or a hydration sleeve that no longer holds its shape and allows the bladder to sag. Minor issues like a broken zipper pull or loose thread can be repaired, but structural compromises affect safety. Most organizers last 300-500 trail miles under normal use, though harsh conditions or overloading can halve this. If you upgrade to a significantly different pack size or switch hydration bladder brands, consider whether your current organizer’s compatibility features still meet your needs.
Budget Considerations
Price vs. Performance Analysis
Hydration-bladder compatible organizers range from $25 budget options to $150 premium systems. Budget models typically use lighter-weight fabrics (210D nylon) and simpler construction, lasting one to two seasons of heavy use. Mid-range options ($60-90) offer the best value, balancing durable materials (420D-630D nylon), thoughtful features, and repairable construction. Premium organizers justify their cost through ultralight materials like Dyneema, lifetime warranties, and modular systems that adapt to multiple packs. Calculate cost-per-use: a $100 organizer used weekly for five years costs about 38 cents per hike. Compare this to the frustration of a failed $30 organizer mid-trip, potentially forcing you to abandon gear or cut a hike short.
Long-Term Value Proposition
Consider an organizer’s adaptability to future gear changes. Models with adjustable compartments accommodate different shelter systems or camera gear as your interests evolve. Repairable designs with replaceable zipper pulls and buckles extend lifespan beyond single-season gear. Some manufacturers offer upgrade kits that retrofit older organizers with new features, protecting your investment. Evaluate warranty terms carefully—lifetime warranties on materials and workmanship indicate manufacturer confidence, but “normal wear” exclusions often deny coverage for abrasion damage, the most common failure mode. An organizer that saves you from buying multiple specialized stuff sacks or prevents gear damage pays for itself quickly.
Frequently Asked Questions
How do I know if an organizer will fit my specific hydration bladder brand?
Most quality organizers accommodate standard bladder dimensions, but verify the sleeve width and height against your bladder’s filled measurements. Bladder brands vary by about 10-15% in width, so if you use a wider insulated bladder, look for organizers specifying “wide-mouth compatibility” or adjustable side compression in the sleeve.
Can I use a hydration-bladder compatible organizer in a pack without a dedicated hydration port?
Yes, but you’ll need to modify the setup. Route the hose through the pack’s main opening and secure it along the shoulder strap with Velcro wraps or hose clips. Consider adding a grommet kit to create a clean exit point, positioning it high on the pack body to maintain a good hose curve. Some hikers simply leave the hose inside the pack and pull it out when needed, though this reduces convenience.
What’s the best way to prevent my hydration tube from freezing in winter?
Combine an insulated organizer sleeve with a tube insulation cover, and route the hose through your pack until the final exit point. Blow water back into the bladder after each drink to empty the tube. Some hikers add a small chemical hand warmer near the bladder in extreme cold, though this adds weight. Positioning the bite valve inside your jacket between drinks also helps.
Should I choose an organizer with more pockets or fewer, larger compartments?
This depends on your gear style. If you use many small items (camera accessories, repair kit, first aid), more pockets prevent chaos. For bulkier items (clothing, food bags), larger compartments with some compression work better. Most hikers prefer a hybrid: 2-3 main compartments plus 4-6 smaller pockets for specific categories.
How do I clean mold from my organizer’s hydration sleeve?
Create a solution of one part white vinegar to three parts water, and scrub the sleeve with a bottle brush. Let it sit for 10 minutes, then rinse thoroughly. For stubborn mold, use a specialized gear cleaner like Mirazyme, which breaks down organic material without damaging fabrics. Sunlight kills remaining spores—dry the sleeve in direct sun for two hours, then store only when completely dry.
Will adding an organizer significantly increase my pack’s total weight?
A quality organizer adds 4-14 ounces, but it often replaces multiple stuff sacks and allows more efficient packing, potentially reducing overall weight. The organization also prevents gear damage, saving replacement costs. Most hikers find the weight penalty negligible compared to the convenience and protection benefits.
Can I modify a standard backpack organizer to work with a hydration bladder?
Yes, with careful execution. Add a hydration sleeve using a waterproof stuff sack sewn into the organizer’s back panel, or create a hanging point with a reinforced webbing loop. Cut a hose port and bind the edges with grommet tape to prevent fraying. However, DIY modifications often void warranties and may not distribute weight as effectively as purpose-built designs.
How often should I replace my hydration bladder when using an organizer?
Bladder lifespan depends on care, not organizer use. Replace bladders every 1-2 years or immediately if you notice taste changes, visible mold inside that won’t clean out, or seam separation. A well-designed organizer actually extends bladder life by preventing abrasion and supporting the weight properly, reducing stress on seams.
Are there organizers specifically designed for women’s packs or smaller torso lengths?
Yes, several manufacturers offer “S” or “XS” sizes with reduced height and modified proportions that fit women’s-specific packs and smaller frames. These maintain the same features as standard sizes but position pockets and access points within comfortable reach. Some brands use a more tapered shape that matches the narrower profile of women’s packs.
What’s the biggest mistake hikers make when choosing an organizer?
Selecting based on pack liter rating rather than actual internal dimensions. A 50L pack with a curved frame and sleeping bag compartment might only have 35L of usable main compartment space, making a “50L organizer” far too large. Always measure your pack’s interior and compare to organizer dimensions, considering how your other gear fills the remaining space.'