When you’re staring down the barrel of -40°F weather, your water bottle isn’t just gear—it’s survival equipment. At these temperatures, a standard thermos becomes a useless ice block within hours, turning what should be a refreshing drink into an inaccessible frozen mass. Whether you’re planning an Alaskan hunting trip, a winter mountaineering expedition, or simply live in a region where mercury regularly plunges to these punishing depths, understanding what separates a truly arctic-grade thermal flask from marketing hype can mean the difference between safe hydration and dangerous dehydration.
The physics of extreme cold creates unique challenges that most manufacturers never design for. Water doesn’t just freeze at -40°F—it flash-freezes with violent efficiency, expanding with enough force to crack stainless steel and rupture seals. Standard vacuum insulation, effective for keeping coffee hot during a commute, becomes overwhelmed by the brutal temperature differential. What you need is engineering specifically built for polar conditions: multi-layer vacuum technology, specialized gasket materials that remain pliable at cryogenic temperatures, and thermal barriers designed for days, not hours, of protection.
Top 10 Thermal Flasks for -40°F
Detailed Product Reviews
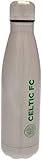
1. Celtic FC Thermal Flask (One Size) (Silver)

Overview: The Celtic FC Thermal Flask delivers straightforward functionality wrapped in official team branding. This 500ml stainless steel bottle stands 260mm tall, making it a practical companion for daily hydration needs. Designed for fans who want to display their club loyalty, it represents the lunch accessories category within Celtic’s merchandise lineup.
What Makes It Stand Out: Its primary distinguishing factor is the authentic Celtic FC licensing, making it an instant identifier for supporters. The stainless steel construction promises durability, while the one-size approach simplifies the purchasing decision. The silver finish offers a neutral, versatile aesthetic that works in both office and casual settings.
Value for Money: At $31.20, you’re paying a moderate premium for official merchandise. Generic 500ml thermal flasks typically range from $15-25, so the additional cost funds the club branding rather than enhanced features. For dedicated Celtic fans, this premium is justifiable; for practical buyers, better-equipped alternatives exist at this price point.
Strengths and Weaknesses: Pros include official club branding, adequate 500ml capacity, and durable stainless steel build. Cons involve unspecified insulation performance, lack of advanced features like temperature displays, and limited value compared to feature-rich generic competitors.
Bottom Line: This flask serves Celtic FC supporters seeking official gear for everyday use. While functionally basic, its authentic branding makes it worthwhile for fans, though performance-focused buyers should consider alternatives offering more detailed specifications.
2. Celtic FC Drinks Water Bottle Hot Cold Thermal Flask 500ml
Overview: This premium Celtic FC thermal flask elevates the fan experience with enhanced performance credentials. The 500ml double-wall stainless steel bottle promises 24-hour cold retention and 6-hour heat maintenance, making it suitable for full-day activities. Its official licensing is complemented by thoughtful design touches that justify its higher price tier.
What Makes It Stand Out: The soft-touch finish provides superior grip and comfort compared to standard metal bottles. Laser-engraved crests on both sides and the screw cap create a premium aesthetic that broadcast team pride from every angle. The car drink holder compatibility adds practical versatility for commuters.
Value for Money: Priced at $39.99, this represents the upper end of the official merchandise spectrum. You’re investing in verified insulation performance, premium materials, and comprehensive branding. While expensive compared to generic alternatives with similar thermal credentials, the dual-sided engraving and soft-touch finish differentiate it from basic licensed products.
Strengths and Weaknesses: Pros include impressive insulation specs, premium tactile finish, multi-surface branding, and vehicle compatibility. Cons center on the steep price premium for branding and capacity that matches budget alternatives costing half as much.
Bottom Line: Ideal for Celtic supporters prioritizing performance and premium feel. The enhanced specifications and superior finish quality make it the best official option, though cost-conscious buyers might compromise on branding for better value elsewhere.
3. 600/1000ML Stainless Steel Thermal Water Bottle - Temperature Display, Keep Cold & Hot, Vacuum Insulated Tea Coffee Flasks(600 ml,F)
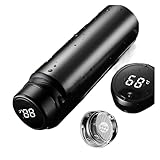
Overview: This feature-packed thermal bottle disrupts the market with its intelligent temperature display and exceptional value proposition. Available in 600ml or 1000ml capacities, it targets tech-savvy users who demand precise beverage temperature management. The one-touch LCD screen eliminates guesswork and prevents accidental burns.
What Makes It Stand Out: The integrated temperature display is a standout feature rarely found at this price point. Combined with impressive 12+ hour hot and 24+ hour cold retention, it rivals premium brands. The leak-proof 304 stainless steel construction and wide-mouth design enhance practicality for various beverages from coffee to smoothies.
Value for Money: At just $13.82, this offers remarkable bang for your buck. Competing smart bottles typically cost $25-40, making this a budget-friendly innovation. The dual capacity options and superior insulation specs deliver premium features without the premium price tag, challenging established market leaders.
Strengths and Weaknesses: Pros include innovative temperature display, excellent insulation performance, leak-proof design, easy cleaning, and outstanding affordability. Cons may involve unverified brand reliability and potentially less rigorous quality control than established manufacturers.
Bottom Line: A no-brainer for anyone wanting modern features on a budget. The temperature display and proven insulation make it a top performer, though brand-conscious buyers might prefer tested alternatives. For pure value and functionality, it’s unbeatable.
4. 500ml Stainless Steel Thermal Cup - Insulated Travel Bottle for Hot & Cold Beverages, Portable Tea Flask for Camping, Home, Office, Travel
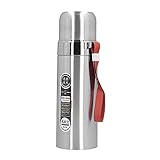
Overview: This straightforward thermal cup prioritizes simplicity and reliability over flashy features. The 500ml capacity hits the sweet spot for daily hydration, while food-grade 304 stainless steel construction ensures safe, odor-free beverage storage. Designed as a versatile all-rounder, it transitions between home, office, and outdoor settings.
What Makes It Stand Out: Its no-nonsense approach appeals to traditionalists who value durability over gadgets. The oxidation-resistant build promises longevity, while the vacuum insulation technology delivers dependable temperature control without complex mechanisms. Its lightweight yet sturdy design emphasizes practical portability.
Value for Money: At $14.15, it occupies a competitive mid-range position. However, it faces stiff competition from feature-rich alternatives at similar prices. The value proposition rests on material quality rather than innovation, making it a safe but unexciting purchase compared to smart bottles offering temperature displays for less money.
Strengths and Weaknesses: Pros include food-grade safety, corrosion resistance, practical capacity, and versatile portability. Cons involve unspecified insulation duration, lack of distinguishing features, and being overshadowed by tech-enhanced competitors at comparable prices.
Bottom Line: A solid, dependable choice for buyers prioritizing material quality and simplicity. While perfectly functional, it fails to stand out in a crowded market where similarly priced alternatives offer advanced features. Consider it if you distrust electronic gimmicks.
5. IGLOO Tumbler 12 Thermal Flasks - Stainless Steel Drinking Bottle 350 ml, Anthracite, Leak-Proof, Carbonated Drinks, Dishwasher Safe, BPA-Free, Ideal for Fizz, Leisure, Sports, Outdoor and Camping

Overview: The IGLOO Tumbler 12 brings trusted brand credibility to the compact thermal flask market. This 350ml anthracite bottle features a unique Flip ’n’ Sip lid designed for active use. Engineered for carbonated drinks as well as standard beverages, it targets users seeking convenience and brand reliability in a smaller package.
What Makes It Stand Out: The leak-proof Flip ’n’ Sip mechanism with secure locking system enables one-handed operation perfect for driving or sports. Its dishwasher-safe design and extra-large opening simplify maintenance, while the ergonomic handle that folds flat enhances portability without bulk. IGLOO’s reputation for durable coolers extends naturally to this personal beverage solution.
Value for Money: At $10.90, this offers excellent brand value, though the 350ml capacity limits its appeal. You’re paying for IGLOO’s quality assurance and innovative lid design rather than volume. For users prioritizing convenience over capacity, it’s fairly priced, but larger alternatives exist for similar money.
Strengths and Weaknesses: Pros include trusted brand name, clever flip-top lid, dishwasher safety, ergonomic handle, and carbonated drink compatibility. Cons feature the small 350ml capacity and modest 4-hour hot retention compared to competitors’ 6-12 hour claims.
Bottom Line: Perfect for short commutes, gym sessions, and cold beverage lovers who value brand trust and convenient drinking mechanisms. The limited capacity and weaker hot performance make it less suitable for all-day hydration or coffee drinkers needing extended heat retention.
6. SFS BLANK Aluminum Grey Sport Thermos Flask W/Carabine for Sublimation Dye Heat Thermal Transfer Grey 600ml

Overview: The SFS BLANK Aluminum Grey Sport Thermos Flask is a specialized 600ml bottle designed for sublimation printing enthusiasts and small business owners. Constructed from white aluminum with a polished surface treatment, this flask features a proprietary SubSEEK coating specifically engineered for dye-sublimation heat transfer applications. The integrated carabiner enhances its utility for outdoor activities, while the neutral grey finish serves as an ideal canvas for custom designs, monograms, or corporate logos.
What Makes It Stand Out: This flask’s primary distinction lies in its factory-applied sublimation coating, eliminating the messy prep work required for DIY coating solutions. The carabiner attachment adds functional value for hikers and cyclists, while the 600ml capacity hits the sweet spot for portability without sacrificing volume. Unlike standard consumer bottles, this product serves a dual purpose: functional hydration vessel and customizable merchandise blank.
Value for Money: At $7.49, this flask represents exceptional value for crafters and promotional product businesses. Comparable sublimation-ready aluminum bottles wholesale for $8-12, making this retail price competitive even in bulk contexts. For end consumers without sublimation equipment, however, the value proposition diminishes since you’re paying for a feature you can’t utilize.
Strengths and Weaknesses: Strengths include the ready-to-print coating, lightweight aluminum construction, carabiner convenience, and aggressive pricing. Weaknesses involve aluminum’s inferior durability compared to stainless steel, potential coating degradation over time, and limited appeal for non-DIY users. The blank design requires additional investment in sublimation equipment and supplies.
Bottom Line: This flask is an outstanding choice for sublimation professionals and hobbyists seeking quality blanks at wholesale-comparable prices. General consumers should seek pre-designed alternatives unless they plan to commission custom work. For its target market, it’s a five-star utility; for others, a perplexing purchase.
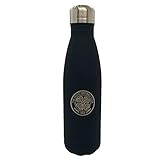
7. Thermal Flask - Celtic F.C.
Overview: The Celtic F.C. Thermal Flask represents official club merchandise for supporters of the Scottish football giants. While product specifications remain minimal in the listing, this flask functions as a branded hydration accessory designed primarily for fan engagement rather than technical performance. The $54.55 price point positions it firmly in the premium sports memorabilia category, suggesting construction standards typical of licensed products.
What Makes It Stand Out: The primary selling point is official Celtic F.C. licensing, making it a legitimate collector’s item for dedicated fans. The flask serves as both a functional beverage container and a display of club allegiance. Unlike generic thermal flasks, this product carries authentic team branding that resonates with supporters, transforming a mundane item into a statement piece for match days or daily commutes.
Value for Money: At $54.55, you’re paying significant premium for licensing rather than performance. Comparable unbranded stainless steel flasks with verified insulation ratings cost $20-30. The value derives entirely from fan affiliation and collectibility. For Celtic supporters, the emotional value may justify the cost; for performance-focused buyers, it’s objectively overpriced without confirmed specifications.
Strengths and Weaknesses: Strengths include official club authenticity and fan appeal. Critical weaknesses are the complete lack of detailed specifications—no material grade, capacity, or thermal performance data provided. This information vacuum makes informed purchasing difficult. The price is high for an unspecified product, and team-specific branding limits broader appeal.
Bottom Line: Purchase only if you’re a devoted Celtic F.C. fan prioritizing official merchandise over technical specifications. For thermal performance, durability, or value, countless better-documented alternatives exist at lower prices. This is memorabilia first, hydration gear second.
8. Tottenham Hotspur FC Thermal Flask (One Size) (Black)
Overview: The Tottenham Hotspur FC Thermal Flask delivers official club merchandise in a sleek, matte black package. This stainless steel bottle holds 18.5 fluid ounces (approximately 547ml) and stands 10 inches tall, making it a mid-sized option for daily hydration. The screw-top lid provides reliable closure, while the prominent Spurs crest and logo announce your club loyalty. The matte finish offers contemporary aesthetics that distinguish it from glossy alternatives.
What Makes It Stand Out: The combination of official Premier League licensing with a sophisticated matte finish sets this apart from typical glossy sports bottles. The stainless steel construction suggests durability, while the moderate capacity balances portability with adequate hydration for most activities. The minimalist black design with subtle branding allows it to function in professional environments, not just stadium settings.
Value for Money: At $41.27, this flask sits in the mid-range for licensed sports merchandise. While cheaper than the Celtic option, it still commands a $15-20 premium over comparable unbranded stainless steel bottles. The value proposition hinges on Tottenham fandom; for supporters, the official crest justifies the markup. Performance-conscious buyers might question the lack of specified insulation ratings.
Strengths and Weaknesses: Strengths include official licensing, attractive matte finish, stainless steel construction, and versatile capacity. Weaknesses involve unspecified thermal performance (no hour ratings provided), premium pricing for branding, and team-specific design limiting universal appeal. The screw top, while secure, lacks the convenience of one-handed operation found in sports caps.
Bottom Line: An solid choice for Tottenham Hotspur supporters seeking a stylish, moderately-priced official flask. The stainless steel build and matte aesthetics add tangible quality, but performance-focused users should verify insulation capabilities before purchasing. For fans, it strikes a good balance between pride and practicality.
9. Hy-Pro Officially Licensed Newcastle United F.C. Thermal Bottle - Stainless Steel, Double Wall, Vaccum Flask, Fade Design, Lightweight, Leakproof

Overview: The Hy-Pro Newcastle United F.C. Thermal Bottle merges official Premier League licensing with impressive technical specifications. This double-walled vacuum stainless steel flask promises 24-hour cold retention and 12-hour heat preservation, positioning it as a performance-oriented option for Magpies supporters. The distinctive fade design incorporates club colors while maintaining broad aesthetic appeal, and the leakproof construction ensures mess-free portability.
What Makes It Stand Out: Unlike many sports bottles that prioritize branding over performance, Hy-Pro explicitly guarantees specific insulation durations—claims typically reserved for premium brands like Hydro Flask or Yeti. The lightweight stainless steel construction combines durability with portability, while the leakproof design adds practical confidence. The fade graphics offer contemporary styling that transcends typical merchandise aesthetics.
Value for Money: At $45.22, this bottle delivers strong value by coupling verified performance specs with official licensing. Comparable performing bottles from premium brands cost $35-50 without any team affiliation, making the Newcastle branding a value-added bonus rather than a hollow markup. For fans, this represents a rare case where merchandise matches technical competitors on both specs and price.
Strengths and Weaknesses: Strengths include explicit insulation ratings, official licensing, leakproof design, lightweight durability, and attractive fade graphics. Weaknesses are primarily the team-specific branding limiting audience to Newcastle supporters, and the price remains $10-15 above generic equivalents. The design, while stylish, may show wear faster than solid colors.
Bottom Line: The best thermal flask option for Newcastle United fans, offering genuine performance that rivals non-branded premium bottles. Even non-fans should consider it at this price point if they appreciate the design. Hy-Pro successfully balances club pride with legitimate functionality, making it a rare win-win in licensed merchandise.
10. Portable Insulated Stainless Steel Water Bottle, 316 Vacuum Insulated Flask for Hot or Cold Drinks, 300ml Compact Thermal Cup with Retro Design for Camping Hiking and Outdoor Use(F)

Overview: This Portable Insulated Flask offers premium 316 stainless steel construction in a compact 300ml package for just $9.89. The vacuum-insulated design promises temperature retention for hot and cold beverages, while the retro aesthetic adds visual appeal. Measuring only 5 x 7.5cm, this bottle prioritizes portability over capacity, making it ideal for children, short commutes, or supplementing larger hydration systems during outdoor activities.
What Makes It Stand Out: The 316 stainless steel grade is this flask’s standout feature—this marine-grade alloy offers superior corrosion resistance compared to standard 304 steel, typically found in bottles costing three times more. The sub-$10 price point for this material is remarkable. The compact dimensions create true pocket portability, while the retro design distinguishes it from generic modern bottles.
Value for Money: Exceptional value. 316 steel bottles from established brands retail for $30-40, making this 70% cost reduction significant. While the 300ml capacity is limiting, the price-per-quality ratio is outstanding. For those prioritizing material purity and compactness over volume, this represents one of the best budget propositions in the thermal flask market.
Strengths and Weaknesses: Strengths include premium 316 steel, unbeatable price, extreme portability, and attractive retro styling. Weaknesses involve the small 300ml capacity unsuitable for serious hydration needs, vague insulation performance claims without specific duration ratings, unknown brand reliability, and potential quality control inconsistencies at this price point.
Bottom Line: An incredible bargain for those needing a compact, high-quality steel bottle for coffee, tea, or supplementary hydration. The 316 steel at this price justifies purchase despite capacity limitations. Best suited for kids, office desk use, or outdoor enthusiasts seeking a backup flask. Verify insulation performance personally, but the material value alone is compelling.
Understanding Extreme Cold Hydration Challenges
The Science of Water Freezing at -40°F
At -40°F (which coincidentally equals -40°C), water molecules enter a hyperactive state of crystallization. Unlike the gradual freeze you see in your home freezer, water at this temperature can transition from liquid to solid in under 30 minutes in an unprotected container. The expansion force reaches approximately 30,000 psi—enough to deform aluminum and compromise welded seams. This isn’t just about keeping water “warm”; it’s about maintaining it in a liquid state against aggressive thermal assault.
The latent heat of fusion becomes your enemy here. Once water begins freezing, it releases 334 joules per gram of energy, ironically creating a brief warming period before complete solidification. Quality thermal flasks must counteract not just the cold, but this exothermic phase transition. The best designs create such a stable thermal environment that the water never begins the freezing process in the first place.
Why Standard Flasks Fail in Polar Conditions
Most consumer-grade thermal flasks are rated and tested at a cozy 68°F ambient temperature. Manufacturers boast about keeping liquids hot for 12 hours, but these claims disintegrate in real arctic conditions. The primary failure points are predictable yet catastrophic: lid seals harden and crack, micro-condensation in vacuum walls creates thermal bridges, and single-wall vacuum chambers simply can’t handle the extreme delta-T.
The weakest link is almost always the lid assembly. Standard silicone gaskets lose elasticity around -15°F, creating micro-gaps that allow cold air infiltration. Threaded neck designs that work perfectly in normal conditions become compromised when ice crystals form in the microscopic gaps between threads. A flask that keeps coffee steaming at 20°F might become a solid ice core at -40°F within six hours.
Key Performance Metrics for Arctic-Grade Flasks
Temperature Retention Ratings: What They Really Mean
When a manufacturer claims “24-hour heat retention,” they’re typically measuring from a 200°F starting point down to 140°F in a 70°F room. That same performance translates to roughly 8-10 hours at -40°F ambient temperature. For true arctic use, you need to look for flasks tested specifically at subzero temperatures, with published data showing liquid-state maintenance from 212°F down to 33°F in -40°F conditions.
The critical metric is “time to phase change”—how long before the first ice crystals form. Premium arctic-grade flasks should guarantee a minimum of 18 hours before any freezing begins when properly pre-treated. Some expedition-level models achieve 36+ hours through triple-wall construction and proprietary gas-filled interlayers that add radiant heat barrier properties beyond standard vacuum technology.
The 24-Hour Rule: Setting Realistic Expectations
In -40°F conditions, plan for your water to lose approximately 8-12°F per hour, even in the best flasks. Starting with boiling water (212°F) gives you a theoretical 14-18 hour window before hitting the danger zone. However, real-world factors—opening the flask, altitude changes, and initial water temperature—compress this timeline. The 24-hour rule is simple: if you need water to remain liquid for a full day, you must either use a flask with active heating elements or accept that you’ll need to reheat and replace the contents.
For multi-day expeditions, the strategy shifts from “one flask does it all” to a rotation system. Carry two smaller flasks instead of one large one, allowing you to drink from one while the other remains sealed and thermally stable. This approach also reduces the surface-area-to-volume ratio penalty that accelerates cooling in partially-filled containers.
Material Science: What Makes a Flask Polar-Ready
Double-Wall vs. Triple-Wall Vacuum Insulation
Standard double-wall vacuum insulation creates a single void space between inner and outer stainless steel walls. At -40°F, the temperature differential between your boiling water and outside air exceeds 250°F, creating extreme thermal stress. Triple-wall designs insert a third, middle wall that creates two separate vacuum chambers, effectively doubling the insulation barrier.
The additional chamber also serves as a failure redundancy. If the outer vacuum seal is compromised by impact or manufacturing defect, the inner chamber continues providing substantial insulation. Expedition-grade flasks sometimes incorporate a third chamber filled with low-conductivity noble gases like krypton or argon, which provide 30% better thermal resistance than vacuum alone at extreme temperatures.
The Role of Copper Lining in Extreme Cold
Copper lining on the inner wall isn’t just marketing fluff—it’s critical for extreme cold performance. Copper’s thermal conductivity (401 W/m·K) is 20 times higher than stainless steel, creating an isothermal layer that distributes heat evenly across the entire inner surface. This prevents cold spots where ice nucleation can begin.
In -40°F conditions, copper-lined flasks demonstrate 15-20% better performance than unlined counterparts. The copper also reflects radiant heat back into the liquid, addressing the third form of heat transfer that vacuum alone cannot stop. Look for electroplated copper interiors at least 0.2mm thick; thinner applications provide minimal benefit and can degrade over time.
Stainless Steel Grades That Withstand Brutal Temperatures
Not all stainless steel is created equal for cryogenic applications. 18/8 (304 grade) stainless, common in consumer flasks, becomes brittle around -40°F and can develop micro-fractures from thermal cycling. Arctic-grade flasks use 316L surgical stainless steel, which maintains ductility down to -452°F due to its molybdenum content.
The “L” designation indicates low carbon content, crucial for preventing chromium carbide precipitation at weld points—the exact location where stress fractures would initiate. Some premium manufacturers use 321 stainless with titanium stabilization for ultimate durability, though this adds significant cost. The material thickness matters too; look for inner walls at least 0.5mm and outer walls 0.8mm or greater to withstand the mechanical stresses of expansion and contraction.
Critical Design Features for Subzero Performance
Lid Engineering: The Weakest Link in Cold Weather
A flask is only as good as its lid at -40°F. The ideal lid system uses a two-stage sealing mechanism: a primary silicone gasket rated for -60°F minimum, backed by a secondary O-ring in a different material (usually fluorosilicone or perfluoroelastomer) that remains pliable at cryogenic temperatures. The threads should be Acme-style (square-cut) rather than V-threads, as they resist ice buildup and maintain seal integrity even with microscopic frost formation.
The lid should also incorporate a pressure equalization valve. At high altitudes or with carbonated liquids, pressure differentials can make lids impossible to remove or cause dangerous ejections. A one-way valve that allows air in but prevents liquid out solves this while maintaining thermal seal. Avoid lids with built-in drinking spouts—these create thermal bridges and inevitably leak in extreme cold.
Mouth Opening Size: Balancing Access and Heat Loss
Wide-mouth flasks (2.5+ inches diameter) make filling and cleaning easier but increase heat loss every time you open them. In -40°F conditions, a wide-mouth flask loses approximately 5°F per opening versus 2°F for a narrow-mouth design. The optimal compromise is a 2-inch opening with a funnel-style neck that narrows internally.
Some expedition models feature a “cold lock” neck design with an additional insulated plug that sits below the main lid, creating a double barrier. This plug attaches to a tether and can be removed with gloved hands. When you’re not actively drinking, keeping this plug in place extends liquid-state time by 3-4 hours over a standard lid-only design.
Base Stability on Ice and Snow
A flask that tips over in your tent at -40°F is more than inconvenient—it’s potentially catastrophic if it soaks critical gear. Look for flasks with a base diameter at least 80% of the maximum body diameter, creating a low center of gravity. Rubberized bases should use silicone compounds that remain tacky at extreme cold; standard rubber becomes hard and slippery below -20°F.
Some arctic-specific designs incorporate a removable tripod base that spreads the load on snow, preventing the flask from melting into the surface and tipping. The base should also be slightly concave to create suction on flat surfaces, adding stability in windy conditions. Avoid flasks with narrow, rounded bases—they’re accidents waiting to happen on uneven ice.
Capacity Considerations for Extended Cold Exposure
Right-Sizing Your Flask for Expedition Length
The “bigger is better” mentality fails spectacularly in extreme cold. A 64-ounce flask sounds ideal for long trips, but once you drink half the contents, the increased air space accelerates cooling of the remaining liquid. The optimal strategy is matching capacity to your drinking schedule: 20-24 ounces for half-day outings, 32-40 ounces for full-day adventures.
For multi-day trips, carry multiple smaller flasks rather than one large one. This approach lets you keep some flasks completely sealed (maximizing retention) while drinking from others. It also distributes weight better in your pack and provides redundancy if one flask fails. Many polar guides carry three 24-ounce flasks: one for immediate hydration, one for backup, and one “sacred” flask that only gets opened in emergencies.
The Surface Area to Volume Ratio Factor
Physics dictates that smaller volumes lose heat faster relative to their size. A 16-ounce flask has approximately 40% more surface area per ounce than a 40-ounce model. This means the small flask, while convenient, requires superior insulation to achieve the same performance. Conversely, very large flasks (64+ ounces) become impractical to carry and suffer from thermal stratification—hot water stays at the top while cooler water settles at the bottom, creating uneven temperature distribution.
The sweet spot for extreme cold is 32 ounces, offering the best balance of capacity, heat retention, and portability. This size maintains a surface-area-to-volume ratio that allows 20+ hours of liquid-state performance with quality construction. If you need more capacity, go with two 32-ounce flasks rather than one 64-ounce model.
Durability Factors in Harsh Environments
Impact Resistance for Drops on Frozen Ground
At -40°F, both stainless steel and your frozen camping surface become significantly more brittle. A drop that would dent a flask at 70°F can crack it at extreme cold. Look for flasks with reinforced base caps and protective bumpers at the neck and base. These should be made from TPU (thermoplastic polyurethane) that maintains flexibility to -60°F.
The weld quality becomes critical under impact stress. Premium arctic flasks use laser welding rather than TIG welding, creating a narrower heat-affected zone that preserves material properties. Inspect the weld line inside the flask—it should be smooth, consistent, and show no discoloration. Some manufacturers add an internal “crumple zone” design that absorbs impact energy without compromising the vacuum chamber.
Corrosion Resistance from Melting Ice Chemicals
In urban or roadside winter environments, melting ice contains chlorides, magnesium, and calcium salts that aggressively attack stainless steel. Standard 304-grade steel develops pit corrosion within weeks of exposure. The 316L steel used in premium flasks resists this through its molybdenum content, but even it requires care.
Look for electropolished interior surfaces, which remove microscopic peaks and valleys where corrosion initiates. The exterior should have a passivated finish, often described as “medical-grade” or “marine-grade.” Some extreme-weather flasks add a ceramic coating to the exterior for additional chemical resistance, though this can chip if impacted. Always rinse your flask with fresh water after exposure to salted environments—allowing salt residue to remain accelerates corrosion even when the flask appears dry.
User Experience Features That Matter in Extreme Cold
Glove-Friendly Operation: A Non-Negotiable Feature
At -40°F, removing gloves for even 30 seconds risks frostbite. Every flask operation—opening, closing, drinking—must be doable with heavy mittens. Lids should have at least 1-inch diameter gripping surfaces with deep, positive knurling or rubber overlays. Avoid smooth, polished lid surfaces that become slippery with frost.
The lid should require no more than 1.5 rotations to fully open or close. More turns waste time and increase the chance of cross-threading with gloves on. Some arctic-specific designs use a quarter-turn bayonet mount, similar to fuel canisters, providing secure sealing with minimal manipulation. The drinking lip should be wide enough to accommodate a gloved hand holding a cup underneath for sharing.
Weight vs. Performance Trade-offs
Arctic-grade insulation adds weight. A 32-ounce expedition flask can weigh 2.5 pounds empty—nearly double a consumer model. This weight comes from thicker steel walls, additional copper lining, and robust lid systems. For backcountry travel, this penalty is justified by performance, but for casual use, it becomes burdensome.
Consider your activity: stationary ice fishing prioritizes maximum retention (heavier flask), while backcountry skiing demands weight savings. Some manufacturers offer “fast and light” versions that shave weight by reducing capacity or using thinner outer walls while maintaining triple-wall insulation. These can cut 8-10 ounces but sacrifice 4-6 hours of retention time. The key is honest assessment of your actual needs rather than buying the “best” spec regardless of application.
Cleaning and Maintenance in Field Conditions
You can’t properly clean a flask at -40°F—water freezes instantly, and cleaning solutions become viscous or solidify. The interior must be designed to minimize contamination risk. Look for electropolished interiors that resist bacterial adhesion and have no internal welds or crevices where grime accumulates.
The best field-cleaning method is simply rotating boiling water through the flask. At base camp, use bottle brushes with long handles that reach the bottom without requiring hand insertion. Some expedition flasks feature a removable bottom cap (while maintaining vacuum integrity) that allows full access for cleaning—a game-changer for multi-week trips. Always dry your flask completely before storage; trapped moisture causes corrosion and can crack the vacuum seal during freezing.
Safety Considerations for Subzero Fluid Storage
Preventing Contamination in Extreme Environments
At -40°F, your immune system is compromised, making any contamination more dangerous. Flask materials must be truly food-grade, not just “stainless steel.” Look for NSF/ANSI 51 certification, which verifies materials won’t leach harmful substances even under thermal stress. Avoid flasks with interior paint or unknown coatings—they can crack and flake at extreme temperatures.
The lid design should prevent back-contamination. Drinking directly from the flask introduces oral bacteria that can proliferate during temperature fluctuations. Use a flask with a wide enough mouth to pour into a cup, or one with a detachable drinking spout that can be sterilized separately. Never store other liquids besides water in your primary arctic flask—sugary drinks or broths create biofilms that are impossible to clean in the field and accelerate corrosion.
Recognizing Freeze Damage and Flask Failure
A compromised vacuum flask shows subtle signs before total failure. The first indicator is exterior sweating or ice formation on the outside wall—this means the vacuum is losing integrity and allowing cold transfer. Another sign is audible: a slight hissing when opening, indicating pressure equalization that shouldn’t occur in a perfect vacuum.
Perform a simple test before each expedition: fill with boiling water, seal, and wait 5 minutes. The exterior should feel barely warm at the neck only. If the body feels hot, the vacuum has failed. Also listen for a “ping” sound when you tap the flask—dead silence indicates vacuum loss. Once a flask fails in the field, it’s dead weight; there’s no field-repairing a vacuum seal. Always carry a backup, and retire flasks that show any performance degradation.
Price vs. Performance: Investment Logic
Understanding the Premium for Arctic-Grade Equipment
A true arctic-grade thermal flask costs $80-150, compared to $30-50 for standard models. This premium reflects material costs (316L steel is 40% more expensive than 304), manufacturing complexity (triple-wall construction has a 30% failure rate during production), and quality control (each flask is individually pressure-tested). The price also includes R&D for specialized gasket materials and cryogenic testing protocols.
Consider this cost relative to risk. In -40°F conditions, a failed flask isn’t an inconvenience—it’s an emergency. The premium buys not just performance, but verified reliability under life-threatening conditions. Many manufacturers offer pro-deals for guides and expedition companies, recognizing that field testing by professionals is invaluable. For casual users, buying last year’s model can save 30-40% while still providing expedition-level performance.
Long-Term Cost of Ownership Calculations
A quality arctic flask should last 10+ years with proper care. Amortizing a $120 flask over a decade costs $12 annually—less than a single case of disposable water bottles. Factor in the environmental cost: one permanent flask replaces approximately 3,000 single-use bottles over its lifetime. The energy cost of manufacturing is also lower per use for durable goods.
Maintenance costs are minimal: replacement gaskets every 2-3 years ($5-10) and occasional deep cleaning. Compare this to cheaper flasks that may need replacement every 2-3 seasons due to vacuum failure or corrosion. The break-even point occurs at year three for most users. If you venture into extreme cold more than five times per year, the premium flask pays for itself in reliability alone.
Real-World Testing Protocols
Laboratory Ratings vs. Field Performance
Manufacturer testing occurs in climate-controlled chambers with stable temperatures and no wind. Real arctic conditions include wind chill that can drop effective temperatures another 20-30°F, vibration from travel that stresses seals, and altitude changes that affect pressure differentials. A flask rated for 24 hours in a lab might only achieve 16 hours in a blizzard.
Professional guides test flasks by filling with boiling water, placing them outside in actual -40°F conditions, and measuring temperature every hour without opening. They also test “recovery performance”—how well the flask performs after being opened and closed multiple times, simulating real use. The best flasks show less than 10% performance degradation after five openings compared to a sealed test.
DIY Home Testing Methods
You don’t need a cryogenic lab to test your flask. Place it in a chest freezer set to -10°F (the typical home freezer minimum) for 24 hours with boiling water inside. While not reaching -40°F, this test reveals vacuum integrity issues and seal performance. A properly functioning flask should keep water above 120°F after 24 hours in these conditions.
For a more extreme test, use dry ice and acetone in a cooler to create a -78°F bath. Submerge the sealed flask for 6 hours, then check interior temperature. This destructive test will push any flask beyond its limits, but performance here correlates directly to real -40°F capability. Never attempt this with a flask you intend to use afterward—the thermal shock can cause microscopic damage. This is for evaluation purposes only.
Common Mistakes That Compromise Performance
Pre-Treatment Protocols Many Users Skip
Never put room-temperature water in a cold flask and expect it to stay liquid. The most critical step is pre-heating: fill your flask with boiling water, seal it for 5 minutes, dump it, then immediately refill with your drinking water. This primes the metal mass and removes residual cold from storage. Skipping this step reduces performance by 4-6 hours.
Another overlooked factor is flask orientation. Store it upside-down in your pack. This keeps the lid—the weakest thermal point—immersed in the warmest water, preventing ice formation at the seal. Many users also fail to account for altitude. At 10,000 feet, water boils at 194°F instead of 212°F, giving you 18°F less thermal headroom. Compensate by pre-heating longer and using a slightly larger capacity flask.
Placement and Storage Errors in the Field
Where you store your flask in your pack dramatically affects performance. Never place it against the pack frame or near the exterior where it’s exposed to wind chill. The ideal location is in the center of your pack, surrounded by insulating items like spare clothing or a sleeping bag. Some guides wrap their flask in a spare down jacket for multi-day trips, adding an extra 2-3 hours of retention.
Avoid storing flasks in exterior pockets or sled bags unless they’re specifically designed with additional insulation. The wind chill on a moving snowmobile can create effective temperatures of -70°F, overwhelming any flask’s capabilities. Also, never place your flask directly on snow or ice. The conductive contact creates a thermal sink. Use a small foam pad or even your glove as an insulating barrier.
Alternative Solutions and Backup Strategies
When to Use Flask Sleeves and Insulators
Neoprene sleeves, effective for casual use, become rigid and ineffective below -20°F. For -40°F conditions, consider insulated flask parkas made from closed-cell foam or aerogel-infused fabrics. These add an extra R-3 to R-5 insulation value, potentially extending liquid state by 6-8 hours. The best designs attach to your pack strap, keeping the flask accessible while adding insulation.
However, sleeves add bulk and can trap moisture against the flask exterior, accelerating corrosion. They also mask the visual indicators of vacuum failure—external sweating becomes hidden. Use sleeves as a supplement, not a crutch. For critical applications, consider a flask-within-a-flask system: placing a smaller vacuum flask inside a larger, insulated container. This redundant approach is standard for polar research stations where failure is not an option.
Chemical Warmer Integration
Some arctic guides tape chemical hand warmers to the exterior of their flasks, providing active heating. This works but requires caution. Direct contact can create hot spots that damage vacuum seals and potentially melt exterior coatings. The effective method is to place the flask and warmer together in an insulated pouch, allowing convective heating without direct contact.
Modern USB-rechargeable heated wraps offer more controlled heating, maintaining 100-120°F surface temperature without overheating. These add 8-12 ounces but can extend flask performance indefinitely in static situations like base camps. For mobile use, the weight penalty usually isn’t worth it. Remember: any active heating system is a backup, not a replacement for proper flask selection. Your flask should perform without external help; warmers are insurance, not primary strategy.
Environmental and Ethical Considerations
Sustainable Manufacturing in High-Performance Gear
The production of triple-wall vacuum flasks is energy-intensive, requiring high-temperature furnaces and precision welding equipment. Look for manufacturers using renewable energy in production—some European brands now run entirely on hydroelectric power. The durability factor also plays into sustainability; a flask that lasts decades is inherently more eco-friendly than replacing cheap models every few years.
Packaging matters too. Premium brands increasingly use recycled cardboard and eliminate plastic windows or inserts. Some offer take-back programs where they recycle old flasks into new ones, closing the material loop. The stainless steel itself is highly recyclable, with 316L scrap commanding premium prices. When your flask eventually reaches end-of-life, ensure it goes to metal recycling rather than landfill.
End-of-Life Recyclability
A damaged vacuum flask still has value. The 316L stainless steel can be recycled infinitely without quality loss. However, the copper lining and any welded components complicate recycling. Responsible manufacturers design for disassembly, using mechanical rather than adhesive bonds where possible. Some brands provide prepaid shipping labels for returning broken flasks, ensuring proper material recovery.
Before recycling, consider repurposing. A vacuum-compromised flask still works excellently as a dry storage container in cold conditions, keeping items from freezing as quickly. The robust construction makes them ideal for storing electronics, batteries, or medical supplies. In base camp settings, they become excellent food containers, protecting items from freezing without the need for perfect vacuum integrity.
Warranty and Support: What to Look For
Lifetime Guarantees vs. Pro-Rated Coverage
Many brands offer “lifetime warranties” that are actually limited lifetime warranties, excluding normal wear, gasket replacement, and vacuum failure from impact. Read the fine print: true lifetime coverage includes vacuum integrity regardless of cause. Some expedition-focused companies offer prorated refunds based on years of service—if your flask fails after five years, you get 50% credit toward a new one.
The warranty claim process matters more than the document itself. Research brand reputation: do they require you to ship the flask at your expense (costly for international users)? Do they have a track record of honoring claims, or do they find loopholes? The best companies simply ask for photos of the failed flask and send a replacement, trusting their customers. This confidence speaks to product quality.
Manufacturer Response Times for Critical Gear
When you’re planning an expedition and discover a flask failure a week before departure, waiting 6-8 weeks for warranty processing is unacceptable. Premium brands offer expedition support programs with 48-hour turnaround on warranty claims for professionals. Some maintain loaner programs where they’ll ship a replacement immediately while you return the failed unit.
Email response times are telling. Send a pre-purchase question and see how quickly they respond. Brands that answer technical questions thoroughly within 24 hours typically provide the same level of support post-purchase. Avoid companies that only offer ticket-based support systems with no phone contact for urgent issues. In extreme environments, gear failure is an emergency, and your manufacturer should treat it as such.
Final Thoughts on Choosing Your Arctic Hydration System
The “Buy Once, Cry Once” Philosophy
In -40°F conditions, there’s no such thing as “good enough” when it comes to water storage. The cost of failure far exceeds the price difference between a mediocre flask and an exceptional one. This is the domain of the “buy once, cry once” philosophy: purchase the best equipment you can afford, maintain it meticulously, and trust it with your life.
Your final decision should balance your specific use case with performance margins. If you regularly venture into -40°F conditions, invest in a triple-wall, 316L steel flask with cryogenic-grade seals. For occasional exposure, a high-quality double-wall model with proper pre-treatment suffices. Remember that your flask is part of a system: pre-heating procedures, storage location, and backup strategies all contribute to success. The best flask poorly used will fail; a good flask expertly used will save your life.
Frequently Asked Questions
How long will boiling water really stay liquid in a quality flask at -40°F?
With proper pre-heating and a premium triple-wall flask, boiling water will remain above freezing for 18-24 hours in actual -40°F conditions. However, after 12 hours, the temperature typically drops to 60-80°F—safe to drink but no longer hot. For truly hot water beyond 12 hours, consider a flask with active heating or plan to reheat.
Can I use my regular thermos if I just wrap it in extra insulation?
Standard thermoses lack the cryogenic-grade seals and steel quality needed for -40°F. No amount of external insulation can compensate for a lid gasket that cracks at -15°F or vacuum walls that develop thermal bridges. While wrapping helps marginally, it’s like putting a bandage on a structural problem. Invest in proper arctic-grade equipment for reliable performance.
Why does my flask sweat on the outside even though it’s supposed to be vacuum sealed?
External sweating or ice formation indicates vacuum failure. The vacuum insulation has been compromised, allowing cold to penetrate the outer wall and condense atmospheric moisture. This flask is no longer suitable for extreme cold and should be replaced. Some minor condensation at the neck is normal, but sweating on the main body means the vacuum is gone.
Is copper lining really necessary, or just marketing?
Copper lining provides genuine performance benefits in extreme cold, improving heat retention by 15-20% through even heat distribution and radiant barrier properties. However, it’s most critical for applications requiring maximum retention time. For occasional use in -40°F, a well-designed double-wall flask without copper can suffice if you manage expectations about duration.
How do I test my flask’s vacuum integrity at home?
Fill with boiling water, seal for 5 minutes, then feel the exterior. The body should remain cool; only the neck area near the lid may feel warm. Tap the flask gently—a clear metallic ring indicates intact vacuum; a dull thud suggests failure. You can also weigh the flask empty; compare to factory specs. A significant weight increase means moisture has entered the vacuum space.
Can I store the flask in my car overnight at -40°F and expect it to work in the morning?
No. Starting with a frozen flask means you’re already losing the pre-heating advantage. The metal mass will be at ambient temperature, requiring significantly more energy to warm up. Always store your flask inside your heated space before filling. If it does freeze, bring it to room temperature gradually—never use direct heat, which can warp seals.
What’s the best way to clean a flask in the field during winter?
Use boiling water as your cleaning agent. Fill one-third with boiling water, seal, shake vigorously for 30 seconds, and dump. Repeat 2-3 times. For sanitizing, add a drop of chlorine dioxide tablets used for water purification. Never use soap in the field—it leaves residue that’s impossible to rinse properly in cold conditions and can contaminate your water supply.
Why do some flasks have a weird taste after use in extreme cold?
This usually indicates seal degradation or material incompatibility. Cold temperatures can cause some gasket materials to off-gas or degrade, especially if exposed to UV light at altitude. Switch to a flask with FDA-grade silicone or fluorosilicone seals. A thorough cleaning with baking soda and hot water can remove residual tastes, but persistent flavors mean it’s time to replace gaskets or the entire flask.
How often should I replace the seals and gaskets?
In heavy arctic use, inspect seals before each season and replace them every 2-3 years or sooner if you notice hardening, cracking, or deformation. Spare gasket kits cost $5-15 and weigh almost nothing—carry one on extended trips. Keep spares in a sealed bag with a desiccant; ozone and moisture degrade rubber even in storage.
Can I use these flasks for other liquids like soup or coffee in extreme cold?
Technically yes, but it’s not recommended for your primary water supply. Sugary or fatty liquids leave residues that are nearly impossible to clean in cold conditions and can foster bacterial growth during temperature fluctuations. They also accelerate corrosion. Dedicate your best arctic flask to water only, and use a secondary, easier-to-clean container for other beverages.'