Standing at the edge of a glacier for the first time is humbling. The vast, frozen landscape stretches before you, beautiful and indifferent. Beneath that pristine surface lies a maze of hidden crevasses, and the seemingly stable snowpack can become a slide without warning. This is where the ice axe transforms from a simple tool into your most trusted companion—not just for balance, but for survival. For glacier travel beginners, understanding this essential piece of mountaineering equipment isn’t about buying the most expensive model; it’s about making an informed choice that matches your skill level, body mechanics, and the specific demands of frozen terrain.
The world of ice axes can feel overwhelming at first glance. Technical specifications, mysterious acronyms, and heated debates about length and leash systems fill online forums. But here’s the truth: selecting and using an ice axe is fundamentally about personal safety and efficiency. Whether you’re planning your first guided glacier traverse or dreaming of remote alpine ascents, this guide will demystify every aspect of ice axe selection, maintenance, and technique. We’ll walk through the anatomy of these tools, decode certification ratings, and explore the critical skills that turn a piece of metal into a lifeline—ensuring you’re prepared not just to travel on glaciers, but to do so with confidence and competence.
Top 10 Ice Axes for Glacier Travel
Detailed Product Reviews
1. Bobillow Outdoor Camping Ice Axe Walking Pick for Camping Aluminum Alloy Mountaineering Axe Glacier Climbing Tool Lightweight Design,70 Cm (Blue)

Overview:
The Bobillow Outdoor Camping Ice Axe positions itself as an accessible entry point into winter mountaineering gear. At 70cm with a vibrant blue aluminum alloy construction, this tool targets recreational hikers and novice climbers seeking essential self-arrest capability without premium brand pricing. The axe balances lightweight design with functional versatility for basic snow travel and glacier approaches.
What Makes It Stand Out:
This axe distinguishes itself through practical dual-purpose features at a budget tier. The contoured handle with integrated teeth for probing and the wide adze design for snow excavation demonstrate thoughtful engineering rarely seen at this price point. The 70cm length suits average-height users on moderate terrain, while the high-strength aluminum keeps weight manageable for long approaches.
Value for Money:
At $85.99, the Bobillow undercuts established brands by 30-50%, making it compelling for occasional users. While it lacks the refined finishing of premium axes, the functional design delivers core safety features. For climbers logging fewer than 20 winter days annually, this represents sensible economics compared to $130+ alternatives.
Strengths and Weaknesses:
Strengths include affordability, lightweight aluminum construction, versatile probing teeth, and adequate self-arrest geometry. Weaknesses involve unknown long-term durability, basic B-rating limiting technical use, and less ergonomic grip shaping than premium competitors. The brand lacks Petzl’s or Black Diamond’s testing pedigree.
Bottom Line:
The Bobillow serves budget-conscious adventurers well for introductory glacier travel and snow hiking. Serious alpinists should invest in certified brands, but weekend warriors gain respectable performance and essential safety at a fraction of the cost.
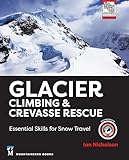
2. Glacier Climbing & Crevasse Rescue: Essential Skills for Snow Travel
Overview:
“Glacier Climbing & Crevasse Rescue: Essential Skills for Snow Travel” is the critical knowledge complement to any ice axe purchase. This instructional resource distills professional guide techniques into accessible methodology for self-sufficient glacier travel. At $30.99, it delivers potentially life-saving information that no physical tool can replace, covering hazard assessment, rope work, and rescue systems.
What Makes It Stand Out:
Unlike gear-focused products, this book addresses the human factor in mountain safety. It specializes in crevasse rescue protocols—a skill set that separates prepared parties from emergency situations. The content bridges theoretical understanding with practical application, making complex anchor systems and mechanical advantage principles digestible for intermediate climbers.
Value for Money:
A professional crevasse rescue course costs $200-500. This manual provides foundational knowledge at 15% of that cost, offering exceptional return on investment. While not substituting for hands-on practice, it enables repeated reference and team study sessions that amplify its value far beyond the purchase price.
Strengths and Weaknesses:
Strengths include comprehensive rescue techniques, portable reference format, and cost-effective education. Weaknesses involve the inherent limitation of text-based learning for kinesthetic skills and the absolute necessity of field practice. Without supervised training, readers risk false confidence.
Bottom Line:
Every glacier traveler should own this manual alongside their ice axe. It belongs in your pack as a field reference and on your bookshelf for pre-season refreshers. Knowledge remains your lightest and most important piece of gear.
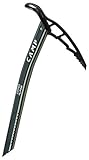
3. PETZL Glacier Linkin Ice Axe - 68 cm (Includes Leash)

Overview:
The PETZL Glacier Linkin Ice Axe (68cm) represents the gold standard for recreational glacier travel and classic mountaineering. This complete kit pairs a refined 7075-series aluminum shaft with a removable LINKIN leash, delivering professional-grade reliability for serious adventurers. The grey anodized finish distinguishes this package from standalone models while providing enhanced corrosion resistance.
What Makes It Stand Out:
PETZL’s engineering excellence shines through the 3mm tapered steel pick, which achieves superior hard-ice penetration without adding unnecessary weight. Machined grip grooves on the shaft provide confident handling during technical sections, while the stainless steel spike ensures secure placement in firm snow anchors. The included leash system prevents costly tool loss in crevasse terrain.
Value for Money:
At $129.95, this kit costs marginally more than the axe alone, essentially providing the $25 leash free. Compared to piecing together components, buyers save 15% while ensuring compatibility. The durability and brand reputation justify the 50% premium over budget alternatives through years of reliable service.
Strengths and Weaknesses:
Strengths include premium materials, ergonomic hand-rest zone, trusted B-rating, and integrated leash system. Weaknesses center on the Type 1 classification, which prohibits technical ice climbing, and the 68cm length may prove short for taller users on low-angle glaciers.
Bottom Line:
For dedicated mountaineers prioritizing safety and quality, the PETZL Glacier Linkin delivers exceptional performance. It dominates the recreational category and belongs on every serious climber’s gear list for non-technical glacier travel.
4. PETZL Glacier Linkin Ice Axe - 75 cm (Includes Leash)
Overview:
The PETZL Glacier Linkin Ice Axe (75cm) offers identical construction to its 68cm sibling, with added length benefiting taller climbers and specific terrain types. This 75cm variant maintains the same premium 7075 aluminum shaft, tapered steel pick, and included LINKIN leash system. The additional 7cm proves strategic for flat glacier travel and users over 6 feet tall.
What Makes It Stand Out:
The length selection demonstrates PETZL’s understanding of ergonomic efficiency. While the 68cm suits steep snow slopes, this longer version excels during walking-intensive glacier approaches where the axe functions as a third contact point. The same high-quality steel pick and stainless spike deliver consistent anchoring performance regardless of shaft length.
Value for Money:
Priced identically to the 68cm at $129.95, the value proposition remains strong. The free leash inclusion and professional-grade materials justify the cost. Taller users avoid the awkward posture of undersized tools, reducing fatigue over long days. The investment prevents the common mistake of purchasing based on price rather than fit.
Strengths and Weaknesses:
Strengths mirror the 68cm model: excellent materials, included leash, and trusted brand reliability. The added length improves balance for specific users. Weaknesses include increased awkwardness in technical or steep terrain and the same Type 1 rating limitations. Length choice requires careful consideration of user height and primary use case.
Bottom Line:
Choose the 75cm version if you’re over 6 feet tall or primarily travel on gentle glaciers. The same PETZL quality applies, but proper sizing maximizes safety and efficiency. Sizing matters as much as brand reputation.
5. CAMP Corsa Alpine Ice Axe - 65 cm
Overview:
The CAMP Corsa Alpine Ice Axe (65cm) targets weight-conscious alpinists and ski mountaineers who refuse to compromise on technical capability. At $128.00, this Italian-engineered tool balances minimalist design with steel-head durability, carving a niche between ultralight aluminum axes and heavy technical tools. The 65cm length optimizes versatility across varied alpine terrain.
What Makes It Stand Out:
The Corsa Alpine’s steel head delivers enhanced durability and penetration compared to all-aluminum designs while maintaining remarkable lightness. The nylon spike plug prevents snow accumulation inside the shaft—a detail that proves invaluable during multi-pitch transitions. The tapered 3mm pick rivals premium competitors in hard-ice performance, and the compact head slot allows seamless leash integration.
Value for Money:
Positioned dollar-for-dollar against the PETZL Glacier, the Corsa Alpine competes aggressively. The steel head offers longer service life, potentially offsetting the leash’s separate purchase. For ski mountaineers counting every gram, the weight-to-performance ratio justifies the investment over budget options that lack technical refinement.
Strengths and Weaknesses:
Strengths include steel head durability, excellent weight savings, snow plug innovation, and technical geometry. Weaknesses involve the less comfortable grip compared to PETZL’s machined grooves and the leash’s additional cost. The B-rating remains appropriate for alpine use but prohibits water ice climbing.
Bottom Line:
The CAMP Corsa Alpine excels for alpinists and skiers prioritizing weight without sacrificing durability. Its steel head advantage and intelligent details make it a top contender for technical glacier travel and steep snow routes.
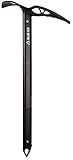
6. PETZL Glacier Ice Axe - 60 cm (Light Blue)

Overview: The PETZL Glacier Ice Axe in 60cm represents the 2025 refresh of a mountaineering staple, combining timeless functionality with modern aesthetics. Weighing 345 grams, this Type 1 (B-rated) tool balances lightweight performance with the durability needed for glacier travel and classic alpine routes. The light blue anodized finish distinguishes it from previous generations while maintaining the trusted PETZL engineering that has made the Glacier series a go-to for mountaineers worldwide.
What Makes It Stand Out: The Glacier’s standout feature is its precision-engineered steel pick tapered to 3mm, delivering exceptional penetration in hard ice without adding unnecessary weight. The machined grooves on the 7075 aluminum shaft provide secure grip zones for both piolet-canne and self-arrest scenarios. The stainless steel spike ensures reliable plunging in firm snow, while integrated connection holes at both head and spike facilitate versatile leash and carabiner attachments. This thoughtful integration of premium materials creates a cohesive tool that handles everything from step-cutting to emergency belays.
Value for Money: At $129.95, the Glacier commands a premium price that reflects its pedigree. While significantly more expensive than budget alternatives, the investment buys proven reliability, refined ergonomics, and a brand reputation backed by decades of alpine innovation. For serious mountaineers who depend on their gear in consequential terrain, the cost-per-use over a decade of service makes this financially sound. Cheaper axes may save money initially but often compromise on steel quality or balance.
Strengths and Weaknesses: Strengths include outstanding weight-to-strength ratio, premium steel components, comfortable ergonomic grip, versatile connection points, and timeless design. The light blue finish adds visibility and style. Weaknesses center on the B-rating, which limits its suitability for technical ice climbing, and the premium pricing that may deter casual users. The anodized finish will eventually show wear.
Bottom Line: The PETZL Glacier 60cm is an exceptional mountaineering axe for dedicated alpinists seeking a lightweight, reliable tool for non-technical terrain. Its premium construction justifies the investment for those who prioritize performance and longevity.
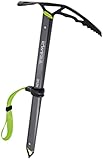
7. TRANGO Altum Ice Ax - Lightweight Aluminum Mountaineering Axe, Steel Pick, Plantable Shaft, Alpine Climbing, Green, 55 cm

Overview: The TRANGO Altum Ice Axe delivers purpose-driven design for weight-conscious alpinists at an accessible price point. At 393 grams for the 55cm model, this axe prioritizes ultralight performance without sacrificing critical functionality. Born from Colorado’s Front Range climbing culture since 1991, TRANGO’s climber-designed approach shows in every detail, from the textured aluminum shaft to the strategic rubber grip pad, creating a tool ready for long alpine expeditions and technical ski mountaineering.
What Makes It Stand Out: The Altum’s defining characteristic is its plantable shaft design combined with a dedicated clip point in the head, enabling quick anchor building and secure snow belays—features typically found on more expensive models. The textured aluminum shaft with integrated rubber grip pad provides confident handling during self-arrest without adding significant weight. The ultra-durable steel pick maintains reliable bite in hard snow and ice, while the thoughtful weight distribution ensures balanced swing dynamics for step cutting and technical traverses.
Value for Money: Priced at $84.95, the Altum represents exceptional value, costing nearly $45 less than premium competitors while delivering comparable performance. The price-per-100cm metric ($154.45) reveals its efficient construction. For recreational mountaineers, guides needing backup tools, or climbers building their first kit, this axe offers professional-grade features without the financial barrier. The weight penalty over elite models is minimal for most applications.
Strengths and Weaknesses: Strengths include outstanding affordability, lightweight aluminum construction, enhanced grip features, versatile anchor capabilities, and authentic climber-driven design. The green finish provides good visibility. Weaknesses include slightly heavier weight than top-tier options, aluminum shaft durability concerns in rocky terrain, and less refined aesthetics compared to premium brands. The B-rating limits technical ice applications.
Bottom Line: The TRANGO Altum is a smart choice for budget-minded mountaineers seeking reliable performance. It excels as a primary axe for beginners or a lightweight backup for professionals, delivering features that far exceed its modest price.
8. PETZL Glacier Ice Axe - 50 cm (Light Blue)
Overview: The 50cm PETZL Glacier Ice Axe brings the same 2025 design updates as its longer siblings in an ultra-compact package ideal for technical terrain and ski mountaineering. Weighing just 320 grams, this is the lightest variant in the Glacier lineup, sacrificing neither the high-quality steel pick nor the ergonomic refinements that define the series. The reduced length excels in steep couloirs and complex alpine routes where maneuverability outweighs reach.
What Makes It Stand Out: At 320 grams, this axe achieves an remarkable weight that competes with specialized ultralight tools while maintaining full B-rated strength and durable steel construction. The 3mm tapered pick and optimized adze remain unchanged from longer models, ensuring identical performance in ice penetration and step cutting. The machined grip grooves on the 7075 aluminum shaft are proportionally positioned for secure handling despite the shorter shaft, making it equally effective in piolet-canne and self-arrest positions.
Value for Money: Maintaining the $129.95 price point of its longer counterparts, the 50cm Glacier offers enhanced value for weight-conscious users. The 25-gram savings over the 60cm version may seem modest, but for ski mountaineers and fast-and-light alpinists, every gram matters. The premium pricing remains justified by PETZL’s quality control and the axe’s versatility across applications where compact storage and quick handling are paramount.
Strengths and Weaknesses: Strengths include exceptional lightness, compact portability, premium steel components, versatile connection points, and proven PETZL reliability. The short length excels in technical terrain. Weaknesses include reduced leverage for low-angle glacier travel, premium pricing that doesn’t scale down with size, and the B-rating limitation for technical ice. The short shaft requires more bending when used as a walking stick.
Bottom Line: The PETZL Glacier 50cm is the optimal choice for technical mountaineers and ski alpinists who prioritize weight savings and compactness. Its premium construction makes it worth the investment for specialized applications.
9. Neve Ice Axe
Overview: The Neve Ice Axe positions itself as a mid-market workhorse, emphasizing durability and comfort over ultralight sensibilities. At 515 grams and 65cm length, this is a substantial tool built from forged chromoly steel throughout the pick and adze, creating a robust axe that handles heavy use and abuse. The included Touring Leash adds immediate value, making this a complete package for mountaineers seeking reliability without premium pricing.
What Makes It Stand Out: The Neve’s forged chromoly steel construction sets it apart in a market dominated by aluminum shafts and mixed-material designs. This all-steel philosophy creates exceptional durability and swing weight for effective chopping and step cutting. The ergonomic shaping of both pick and adze provides comfortable hand placements during extended use, while the steel spike delivers clean, authoritative plunging in firm snow. The integrated carabiner holes at head and spike enable versatile leash and anchor configurations.
Value for Money: At $101.85, the Neve occupies a competitive middle ground, though its 515-gram weight diminishes the value proposition for modern alpinists. The included Touring Leash ($30-40 value) partially offsets the price, making the effective cost quite reasonable. However, climbers can find lighter options at similar or slightly higher prices. This axe delivers best value for users who prioritize durability over ounces and don’t require technical ice performance.
Strengths and Weaknesses: Strengths include outstanding durability from chromoly steel construction, ergonomic design, included leash, reliable steel spike, and comfortable grip geometry. Weaknesses are substantial weight penalty, B-rating limitations, lesser-known brand reputation, and outdated heaviness for fast-and-light objectives. The weight makes it unsuitable for technical climbing or long approaches.
Bottom Line: The Neve Ice Axe suits mountaineers who value bombproof construction over weight savings. It’s ideal for training, heavy-duty glacier travel, or climbers rough on gear, but modern alpinists will find lighter alternatives more suitable.
10. BLUE ICE Blackbird Ice Axe - Black 60cm
Overview: The BLUE ICE Blackbird Ice Axe delivers classic mountaineering functionality with modern manufacturing and exceptional value. As a “jack-of-all-trades” piolet, the 60cm Blackbird targets entry-level alpinists and experienced climbers seeking a reliable secondary tool. Weighing approximately 330 grams (based on the 49cm spec), it achieves competitive lightness through a stainless steel head and durable aluminum shaft, creating a balanced tool for general mountaineering and glacier travel.
What Makes It Stand Out: The Blackbird’s most compelling feature is its comprehensive accessory package—pick, adze, and spike protectors included—a $25-30 value that most competitors charge separately. The dual-textured grip enhances security during self-arrest without adding weight, while the stainless steel rivets and pick ensure corrosion resistance and durability. BLUE ICE’s commitment to building a true introductory tool shows in the thoughtful balance and classic geometry that handles everything from basic snow travel to moderate alpine routes.
Value for Money: At $109.95 with protectors included, the Blackbird significantly undercuts premium brands while delivering comparable performance. This represents one of the best value propositions in the mountaineering axe market, particularly for beginners who need complete protection for their gear. The quality materials and construction rival axes costing $20-40 more, making it financially accessible without compromising safety.
Strengths and Weaknesses: Strengths include excellent price-to-performance ratio, included protectors, competitive weight, quality stainless steel components, and versatile design. Weaknesses include less established brand recognition than PETZL, potentially lower resale value, and B-rating limitations for technical ice. The black finish may absorb heat and fade over time.
Bottom Line: The BLUE ICE Blackbird is an outstanding value for new mountaineers or as a backup axe. It delivers reliable performance and essential accessories at a price that’s hard to beat, making it a smart practical choice.
Why Every Glacier Traveler Needs an Ice Axe
Glacier travel exists in a unique category of outdoor adventure where the ground beneath your feet is actively trying to kill you. Unlike rock climbing where falls are vertical, or backpacking where terrain is stable, glaciers present three simultaneous hazards: crevasses, slippery surfaces, and steep snow slopes. An ice axe serves as your multi-tool for managing all three.
Beyond the obvious self-arrest capability, your axe becomes a probe for detecting hidden snow bridges, an anchor for crevasse rescue systems, a balance aid on uneven névé, and a brake during glissading. Many beginners mistakenly view it as optional on “easy” glacier routes, but experienced mountaineers know that conditions change hourly. That gentle snowfield at dawn can become a sun-cupped minefield by afternoon. The axe you leave behind to save weight is the one tool you’ll wish for when your boot punches through a hidden void.
Understanding Ice Axe Anatomy: Parts and Terminology
Before diving into selection criteria, you need to speak the language. Every ice axe consists of four primary components, each engineered for specific functions.
The Head: Your Primary Interface
The head comprises the pick, adze (or hammer), and the carabiner hole. Modern picks feature teeth along the underside for biting into ice, while the top remains smooth for comfortable gripping during self-arrest. The adze—a wide, chisel-like blade—excels at chopping steps and clearing snow for tent platforms. Hammer versions replace the adze with a metal striking surface, preferred by climbers who already carry a separate snow shovel.
The Shaft: Connecting You to the Mountain
Shafts come in curved, slightly curved, or straight profiles. Straight shafts excel on low-angle glaciers where the axe functions primarily as a walking stick and self-arrest tool. Curved shafts, typically found on technical models, provide clearance when swinging overhead on steep ice but feel awkward for basic self-arrest practice. For pure glacier travel, a gently curved or straight shaft offers the best versatility.
The Spike: Your Third Point of Contact
The spike at the shaft’s base penetrates snow and ice for secure placement when using the axe as a cane. A sharp, durable spike is non-negotiable for glacier work—it’s what prevents you from skidding across a hard snow slope when you need stability most. Look for spikes with replaceable tips, as they’ll see constant wear.
The Grip: Where Control Happens
Many modern glacier axes feature a rubberized grip zone on the shaft. This isn’t just for comfort; it prevents your hand from sliding during self-arrest and provides purchase when using the axe in climbing positions. For cold-weather travel, a grip that works with gloved hands is essential.
The Three Types of Ice Axes: Which One is Right for You?
Ice axes fall into three distinct categories, and choosing the wrong type is the most common beginner mistake. Each serves a specific purpose in the alpine environment.
Type 1: Basic Glacier Axes (B-Rated)
These lightweight, straight-shafted tools prioritize self-arrest and walking support. With their classic profile and simplified construction, B-rated axes are perfect for snow slopes up to 40 degrees and basic glacier travel. They’re not designed for technical ice climbing or heavy-duty anchoring, but their lighter weight makes them ideal for long approaches and ski mountaineering.
Type 2: Technical Mountaineering Axes (T-Rated)
T-rated axes undergo rigorous testing for strength and durability. They feature stronger picks, more robust shafts, and reinforced construction throughout. While heavier, they’re essential for routes involving steep snow, ice climbing, or building snow anchors. If your glacier travel might involve technical sections or you’re building a kit for future progression, a T-rated axe offers versatility.
Type 3: Technical Ice Tools
These highly specialized tools feature radically curved shafts and aggressive picks designed for near-vertical to overhanging ice. They’re inappropriate for glacier travel—uncomfortable for self-arrest, poor for walking balance, and unnecessarily heavy for the task. Reserve these for water ice and mixed climbing objectives.
Ice Axe Length: Finding Your Perfect Measurement
The “old school” rule of thumb—axe length reaching your ankle when held at your side—has fallen out of favor. Modern thinking prioritizes function over tradition. For glacier travel, length selection depends on your primary use case.
Shorter axes (50-55cm) excel on steeper terrain where self-arrest happens quickly and you need maneuverability. They’re also lighter and pack more easily. However, they provide less support when used as a walking cane on flat glaciers.
Medium lengths (60-65cm) offer the best compromise for most beginners. They provide adequate reach for self-arrest while still functioning effectively as a balance aid. For individuals between 5'6" and 6'0", this range typically works well.
Longer axes (70cm+) shine on gentle glacier approaches where you’ll spend hours using the tool as a trekking pole. The extra length reduces back strain and provides better purchase in soft snow. Taller individuals or those with knee issues often prefer this length.
Shaft Materials: Aluminum vs. Carbon Fiber vs. Steel
Material choice dramatically affects weight, durability, and cost—three factors every beginner must balance.
Aluminum Shafts: The Workhorse Choice
6061-T6 aluminum dominates the glacier axe market for good reason. It’s affordable, durable, and provides excellent strength-to-weight ratio. Aluminum shafts can withstand the abuse of beginner mistakes—like dropping the axe or using it as a makeshift shovel—without catastrophic failure. They also conduct less cold than steel, making them more comfortable in bare hands during brief moments without gloves.
Carbon Fiber Shafts: The Weight Weenie’s Dream
Carbon fiber axes shave 20-30% off the weight of aluminum models, a significant savings on long approaches. However, this weight reduction comes with trade-offs. Carbon is more expensive, vulnerable to impact damage from sharp blows, and can fail catastrophically rather than bending like aluminum. For beginners still developing technique, the durability concerns often outweigh the weight benefits.
Steel Shafts: The Heavy-Duty Option
Full steel shafts appear primarily on T-rated technical axes. They’re virtually indestructible but add considerable weight. For pure glacier travel, steel is overkill unless you’re planning to use the axe extensively for building anchors or expect extreme abuse.
Pick Designs: Curved, Reverse Curve, and Classic Profiles
The pick’s geometry determines how the axe performs during self-arrest and anchoring. Understanding these nuances helps you select the right tool for glacier-specific challenges.
Classic Positive Curve Picks
These traditional picks curve gently downward, providing a secure bite during self-arrest. They’re the most forgiving for beginners because the curved shape naturally rolls you into the correct arrest position. For glacier travel, this design remains the gold standard.
Reverse Curve (Inverted) Picks
Popular on technical ice tools, reverse curve picks point upward when the axe is held normally. They excel at hooking and torqueing in steep ice but perform poorly during self-arrest, often causing the pick to skate across the snow surface. Avoid these for dedicated glacier travel.
Modular Picks: Customization for Evolving Needs
Some axes allow pick replacement, letting you swap between glacier and technical profiles as your skills progress. While convenient, ensure the attachment system is robust—loose picks have caused accidents. For beginners, a fixed positive-curve pick is simpler and more reliable.
Adze vs. Hammer: Choosing the Right Head Configuration
This decision hinges on your broader mountaineering kit and personal preferences.
The Versatile Adze
An adze-equipped axe functions as a snow shovel substitute for minor excavations—cutting tent platforms, digging snow anchors, or chopping steps. On glaciers, this versatility proves invaluable. You can quickly clear snow to inspect crevasse bridges or excavate a rescue trench. For beginners who haven’t yet invested in a dedicated snow shovel, the adze is the smart choice.
The Specialized Hammer
Hammer heads excel at driving pitons and snow pickets, tasks more common in technical mountaineering than basic glacier travel. If you’re building a kit for future alpine climbing, a hammer might make sense. However, most glacier travelers find themselves missing the adze more often than they need a hammer.
The Compromise: Hybrid Configurations
Some manufacturers offer axes with minimal adze/hammer profiles or removable heads. These save weight but sacrifice functionality. For your first axe, accept the slight weight penalty of a full adze—you’ll use it more than you expect.
The Importance of Certification Ratings (CE/UIAA)
Those cryptic markings on your axe head aren’t marketing fluff—they’re safety certifications backed by standardized testing. Understanding them is non-negotiable.
B-Rated vs. T-Rated: What the Tests Actually Mean
B-rated (Basic) axes withstand 2.5 kN of force during pull tests. T-rated (Technical) axes must survive 3.5 kN—40% stronger. This matters for glacier travel in two scenarios: building snow anchors and crevasse rescue. A T-rated axe provides a stronger margin of safety when used as a deadman anchor or T-slot anchor in firm snow.
UIAA Standards: The Global Benchmark
The Union Internationale des Associations d’Alpinisme (UIAA) certification ensures your axe meets international safety standards. Always verify this marking, particularly when purchasing from lesser-known brands. Uncertified axes have failed catastrophically under loads well within normal use parameters.
When B-Rated is Perfectly Acceptable
For non-technical glacier routes under 40 degrees, where the axe functions primarily for self-arrest and walking, a B-rated tool is entirely appropriate. It’s lighter, less expensive, and perfectly safe for its intended use. Don’t let gear envy push you into an unnecessarily heavy T-rated axe if your objectives don’t require it.
Leashes, Leashless, or Hybrid: Attachment Systems Explained
How you connect to your axe affects safety, convenience, and your ability to execute self-arrest. Each system has passionate advocates, but glacier travel presents specific considerations.
The Classic Wrist Leash
A simple adjustable loop prevents dropping your axe during a slip. It’s lightweight, reliable, and keeps your tool within reach. The downside? During self-arrest, a leash can tangle around your wrist, potentially compromising your grip. Many beginners find leashes reassuring, but they require practice to manage effectively.
The Hybrid Retention System
A short tether attaches to your harness or belay loop, preventing total loss while allowing you to release the axe during self-arrest. This system shines for glacier travel—you can’t drop the axe into a crevasse, but you’re not fighting a wrist leash during critical moments. The slight weight increase is worth the security.
Going Leashless: Freedom and Risk
Leashless climbing has gained popularity in technical circles, but for glacier beginners, the risk of dropping your primary safety tool outweighs the benefits. Unless you’re confident in your ability to never, ever drop your axe—even when tripping on a hidden crevasse lip—avoid this system initially.
Sharpening and Maintenance: Keeping Your Axe Rescue-Ready
A dull axe is a dangerous axe. The sharpness of your pick directly impacts its ability to bite during self-arrest and penetrate ice when building anchors.
The Sharpening Process: Tools and Technique
Use a fine metal file or diamond stone, working at the original bevel angle (typically 60-70 degrees). File only the underside of the pick, maintaining the factory geometry. Five to ten light strokes before each season suffice for most users. Avoid power grinders—they remove too much material and can overheat the metal, compromising temper.
Field Maintenance Essentials
Carry a small diamond paddle in your repair kit. A few strokes on a pick dulled by rock contact can restore bite when you’re miles from the trailhead. Inspect your axe after each trip—check for loose rivets, shaft cracks, and pick deformation. Catching issues early prevents failures when you need the tool most.
Storage Between Seasons
Clean your axe with fresh water to remove corrosive salt and dirt. Dry thoroughly, then apply a light coat of mineral oil to the pick and spike. Store horizontally in a dry place, away from extreme temperatures that can degrade rubber grips. Never leave it in a damp gear bag for months.
Self-Arrest Techniques: The Skill That Could Save Your Life
Owning an axe without mastering self-arrest is like buying a parachute without learning how to deploy it. This skill requires dedicated practice, not just theoretical knowledge.
The Four Positions: Practice Until They’re Muscle Memory
You must be able to self-arrest from four fall positions: head-up feet-first, head-down feet-first, head-up head-first, and head-down head-first. Each requires subtle adjustments in axe placement and body positioning. Practice on a safe, 30-degree snow slope with a reliable runout. Start slow, focusing on technique over speed.
Common Self-Arrest Mistakes Beginners Make
Grabbing the axe too high on the shaft reduces leverage. Failing to roll completely onto your stomach leaves your hips dragging, preventing the pick from biting. Looking up during the arrest shifts weight backward, lifting the pick from the snow. Practice with a mentor who can spot these errors before they become ingrained habits.
When Self-Arrest Isn’t Enough
Understand the limits of self-arrest. On slopes over 50 degrees, in hard ice conditions, or during high-speed falls, self-arrest may be impossible. This is why route selection, rope teams, and crevasse avoidance remain primary safety strategies. Your axe is a backup, not a license for risky decisions.
Glacier-Specific Techniques: Crevasse Rescue and Anchoring
Beyond self-arrest, your axe becomes a critical rescue tool when things go sideways.
The T-Slot Anchor: Your First Line of Defense
In firm snow, a T-slot anchor created with your axe can hold significant loads. Cut a horizontal slot, place the axe horizontally with the pick buried and the shaft extending outward, then bury it completely. This anchor can support a crevasse rescue pulley system or serve as a rappel point. Practice construction until you can build one in under two minutes.
Probing for Hidden Dangers
Use your axe spike to probe suspicious snow surfaces. A hollow sound or sudden drop indicates a crevasse bridge. Probe systematically on suspect terrain—every step, probe. This technique has prevented countless falls and should become as automatic as checking your knots.
Improvised Hauling Systems
Your axe can serve as a pulley carabiner in a 3:1 Z-pulley system. While not ideal, this improvisation works in emergencies. The carabiner hole in the head is specifically designed for this purpose. Understanding this application reinforces why you need a T-rated axe for technical glacier routes.
Storage and Transportation: Protecting Your Investment
How you carry and store your axe affects both safety and longevity. A poorly secured axe becomes a hazard to you and your rope team.
The Classic Self-Arrest Position
Carry the axe in your uphill hand with the pick facing backward and the spike pointing forward. This orientation allows immediate deployment if you slip. The adze faces forward, ready for quick use. Practice removing it from this position while wearing gloves—it should be instinctive.
Axe Attachment to Your Pack
When not in use, secure the axe to your pack using dedicated loops or straps. Always position the pick downward and toward the center of your pack, preventing it from catching on branches or snagging your rope. Cover the pick with a removable guard—many injuries occur during casual pack handling.
Air Travel Considerations
Ice axes are permitted in checked baggage but never carry-on. Remove the pick guard and pack it separately to avoid suspicion. Declare it at check-in if asked. Some travelers include a printout of TSA regulations, though this rarely proves necessary. Pad the axe well—baggage handlers aren’t gentle.
Common Beginner Mistakes and How to Avoid Them
Learning from others’ errors prevents you from becoming a cautionary tale. These mistakes persist because they seem logical until disaster strikes.
Mistake #1: Buying Too Much Axe
Beginners often purchase aggressive, technical axes that are overkill for their objectives. This wastes money, adds weight, and can actually be less safe on moderate terrain. Match your axe to your actual climbing, not your aspirational Instagram feed.
Mistake #2: Neglecting the Spike
A dull spike won’t penetrate hard snow, rendering your cane position useless. Yet beginners obsess over pick sharpness while ignoring the spike. File the spike to a point using the same technique as the pick—it’s equally important.
Mistake #3: Inconsistent Hand Positioning
Switching hands with your axe based on terrain seems natural but creates confusion during emergencies. Develop a consistent system: always carry it in your uphill hand, and practice self-arrest with both left and right hands to avoid single-side dependency.
Mistake #4: Skipping Practice
Reading about self-arrest isn’t the same as doing it. Many beginners take an axe into the mountains after watching a single YouTube video. Schedule at least two practice sessions on safe snow before your first glacier trip. Muscle memory is your friend when you’re sliding toward a bergschrund.
Building Your Skills: From First Swing to Confident Travel
Your relationship with your ice axe evolves as you gain experience. Approach this progression methodically.
Phase 1: The Walking Axe
Initially, your axe is primarily a balance aid and probe. Focus on comfortable carry positions, efficient transitions, and basic self-arrest. Spend time on low-angle glaciers, building confidence in snow assessment and route finding. Your axe is there, but your brain remains your primary tool.
Phase 2: The Emergency Tool
As skills develop, you’ll integrate the axe into your crevasse rescue practice. Learn to build snow anchors, execute partner rescues, and improvise systems. Take a formal crevasse rescue course—this is money well spent. Your axe becomes part of a broader safety system.
Phase 3: The Confidence Extension
Experienced glacier travelers wield their axes with unconscious competence. The tool becomes an extension of your assessment process, probing constantly, ready instantly. You’ve developed the judgment to know when to rope up, when to probe, and when the axe alone provides adequate security. This level takes years, not weekends.
Frequently Asked Questions
What length ice axe is best for a beginner glacier traveler?
For most beginners between 5'6" and 6'0", a 60-65cm axe provides the best versatility. It’s long enough for comfortable walking support yet short enough for effective self-arrest. Taller individuals or those prioritizing flat glacier travel may prefer 70cm, while shorter climbers or those on steeper terrain should consider 55cm.
Can I use a technical ice tool instead of a glacier axe?
Absolutely not. Technical ice tools are designed for steep ice climbing and perform poorly during self-arrest. Their aggressive picks can catch dangerously during a fall, and their curved shafts make walking support awkward. Use the right tool for the terrain—your safety depends on it.
How often should I sharpen my ice axe?
Inspect and lightly touch up your pick before each season. If you notice performance issues during self-arrest practice or the pick has visible damage from rock contact, sharpen immediately. A quick five minutes with a diamond stone before a trip is cheap insurance.
Is a B-rated axe safe for glacier travel?
Yes, for non-technical glaciers under 40 degrees, a B-rated axe is completely safe and often preferable due to lighter weight. The rating reflects strength for technical climbing and anchor building. If your routes involve steep snow or you’ll use the axe for crevasse rescue anchors, upgrade to T-rated.
What’s better: leash or leashless for glaciers?
A hybrid retention system tethered to your harness offers the best compromise. It prevents losing the axe in a crevasse while allowing free hand movement during self-arrest. Avoid wrist leashes initially, as they complicate arrest technique, and skip leashless until you’ve gained significant experience.
How do I practice self-arrest safely?
Find a 30-degree snow slope with a long, obstacle-free runout. Wear a helmet and have a partner belay you from below. Start from a standstill, then progress to slow slides. Practice all four fall positions until the movements become automatic. Never practice above hazards like rocks or crevasses.
Should I get an adze or hammer on my first axe?
Choose an adze. You’ll use it constantly for clearing snow, cutting steps, and building tent platforms. A hammer is specialized for technical climbing. Until you’re placing protection on steep alpine routes, the adze’s versatility outweighs any hammer benefits.
Can I fly with my ice axe?
Yes, in checked baggage only. Pack it securely in your luggage, remove any pick guards, and be prepared to declare it at check-in. Never attempt to carry it on. Some climbers pack a printout of TSA guidelines, though this is rarely necessary.
How do I know if a snow bridge is safe to cross?
Probe systematically with your axe spike every step. Listen for hollow sounds and feel for sudden drops in resistance. Look for sagging snow surfaces and avoid cracks. When in doubt, rope up and place protection. No crossing is worth the risk—detour if you’re uncertain.
What’s the biggest mistake beginners make with ice axes?
Buying an overly technical axe and never practicing self-arrest. Your axe is only as good as your ability to use it under stress. A simple, appropriate tool combined with dedicated practice is infinitely more valuable than the latest high-end model gathering dust in your closet.'